Arweave Frontier: Build on the Edge of Blockchain

Did you know, in the genesis block of Bitcoin, the founder, Satoshi, also stored a bit of information other than the transactions ledger?
It was a headline from the British newspaper The Times:
The Times 03/Jan/2009 Chancellor on brink of second bailout for banks

However, the potential to store information wasn’t explored further and Bitcoin consciously continued to exist as a digital currency payment network.
Then came along Ethereum, and similar networks, broadening the scope of blockchains by enabling these networks to operate as general-purpose computers would, capable of executing code of arbitrary and unbounded complexity.
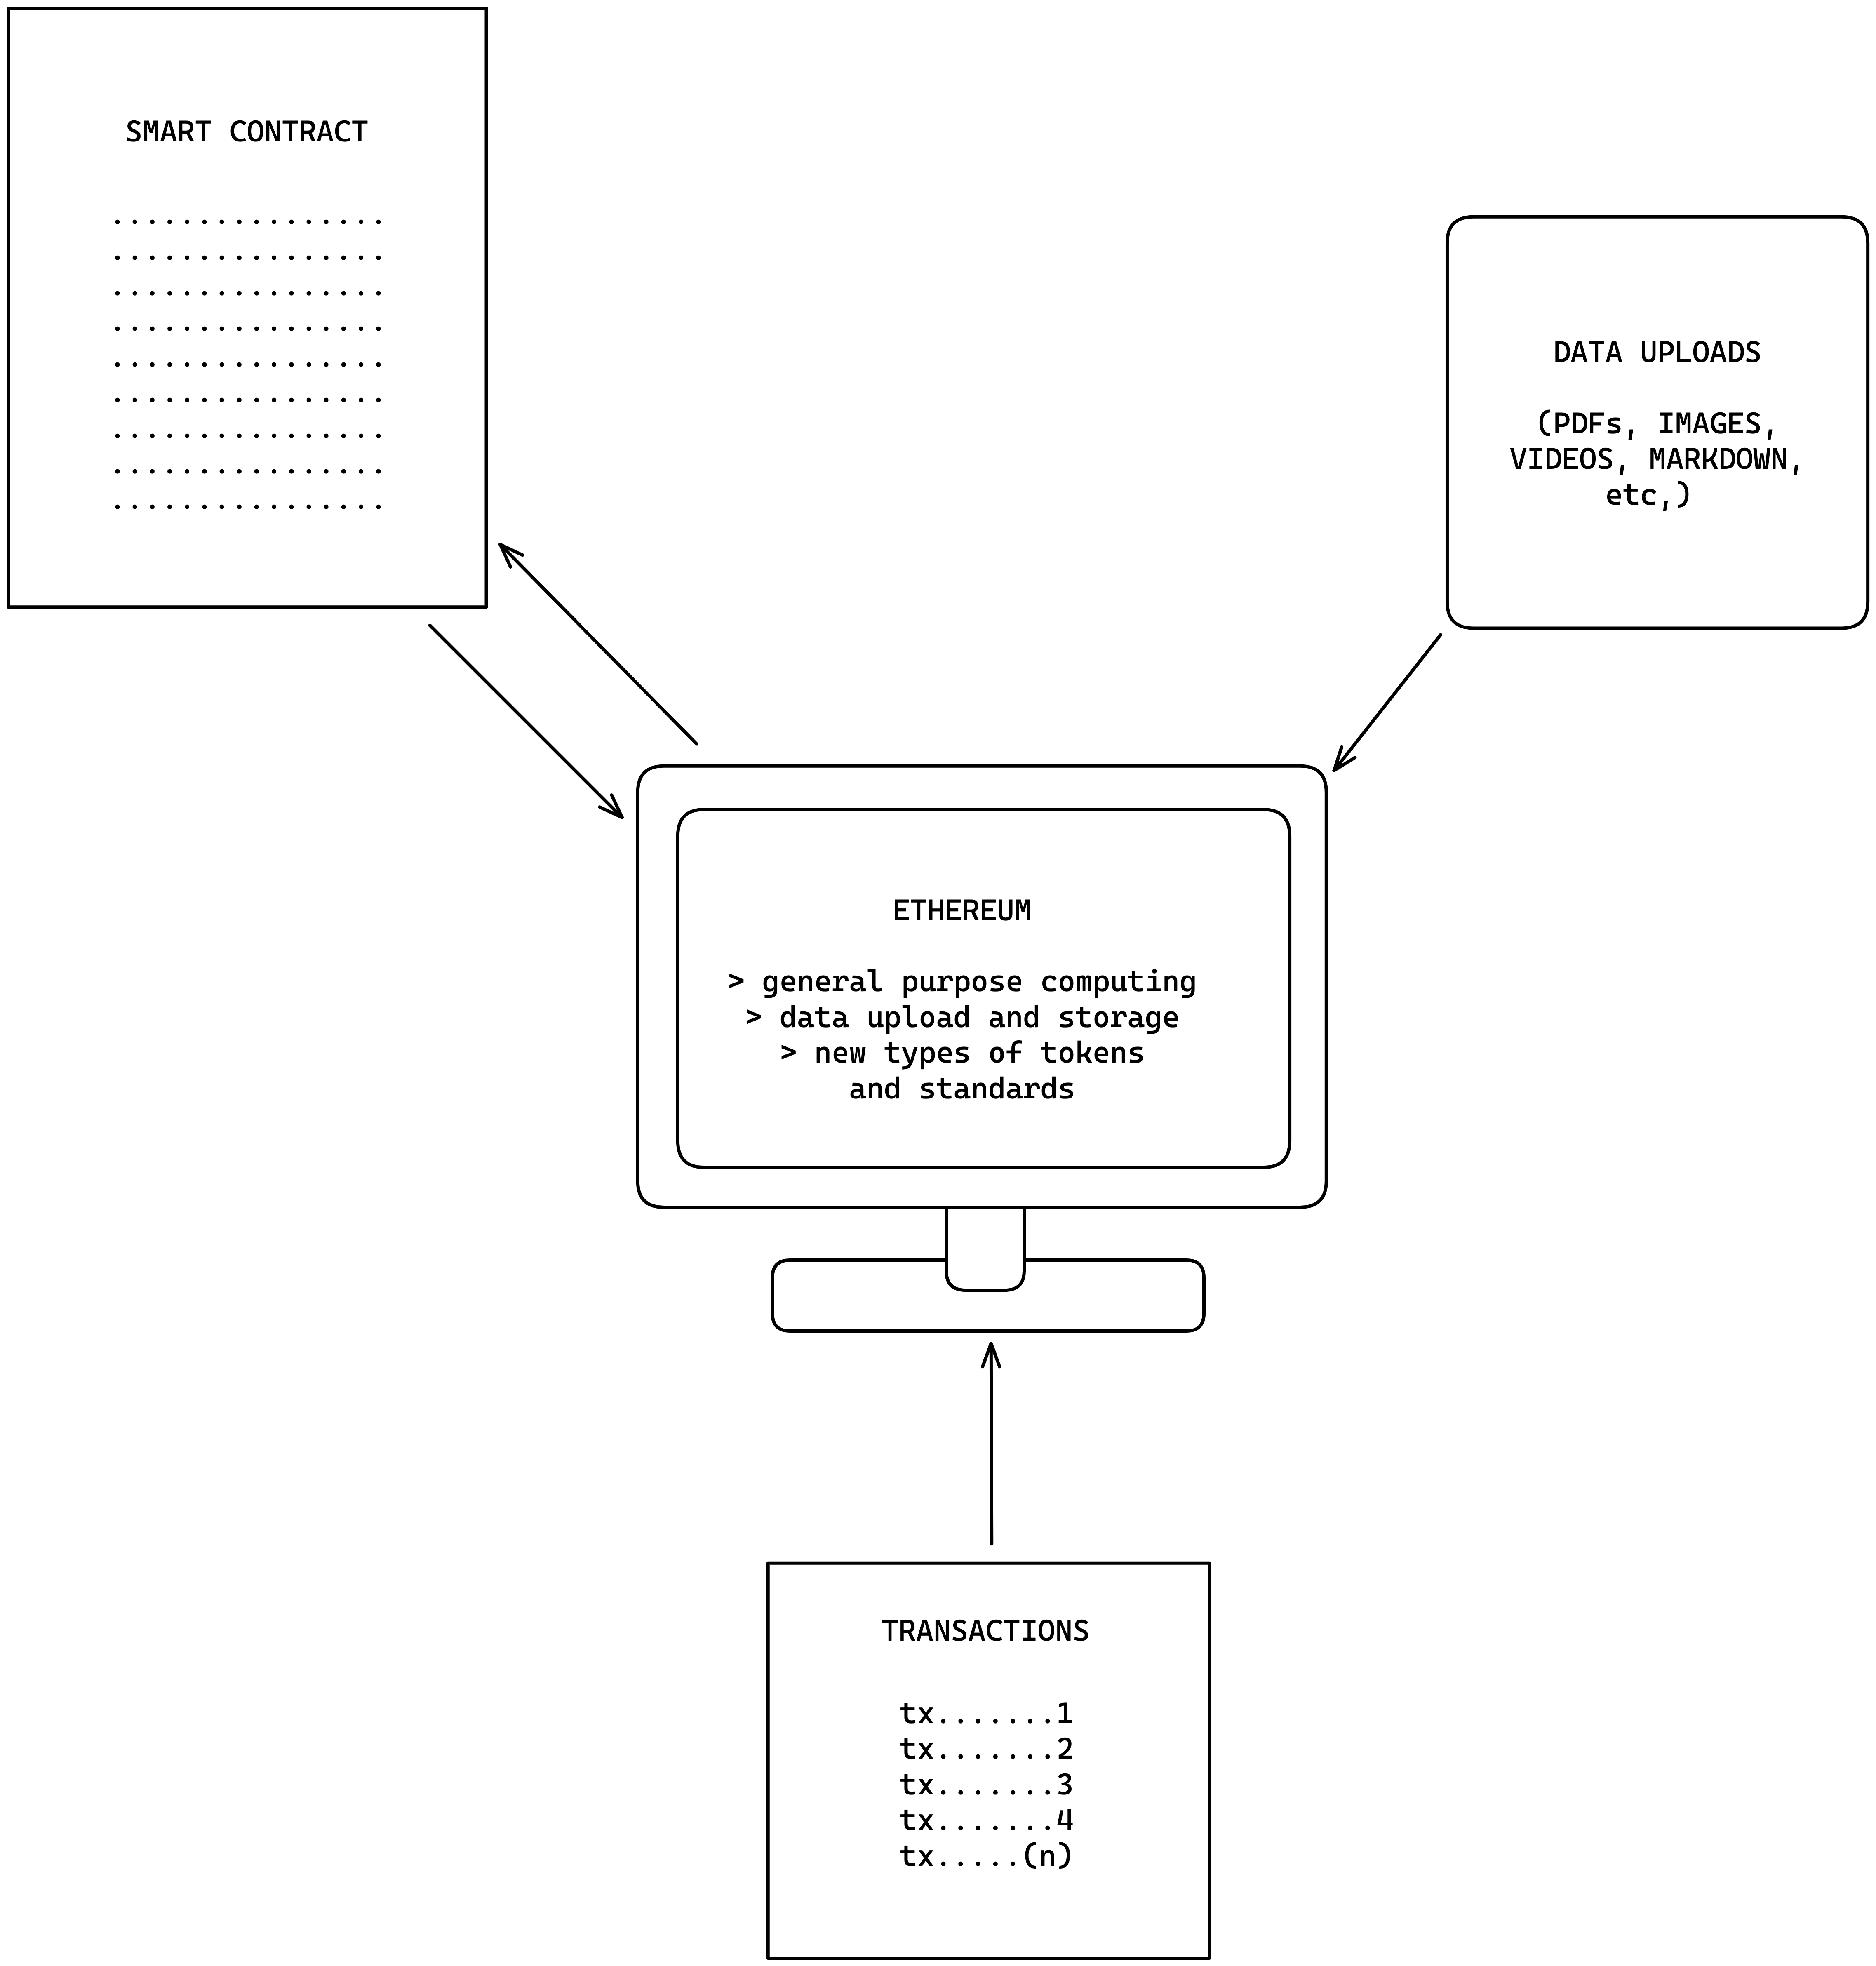
This was a giant leap, opening up the possibility to smart contracts, new token standards, and among other things, the ability to store data. This meant, all this information would be able to leverage, immutability and censorship resiliency.
However, decentralized data storage wasn’t a large area of focus and these networks’ unique mining mechanisms meant storage would be very expensive.
Each miner needs to store a full copy of all the data on-chain and must evaluate and validate every transaction (including data uploads). This coupled with miners racing to solve the block hash first meant increasing storage, computation, and hardware costs. Hence, their operations were still focused on computation while storing only limited amounts of data.
Users preferred storing data on centralized infrastructure due to its relative cost-effectiveness.
Storing 1 GB of data on blockchains like Ethereum can cost tens of thousands of US dollars, varying with market conditions.
Enter Arweave, a protocol that allows you to store data permanently, and sustainably, with a single low-cost upfront fee.
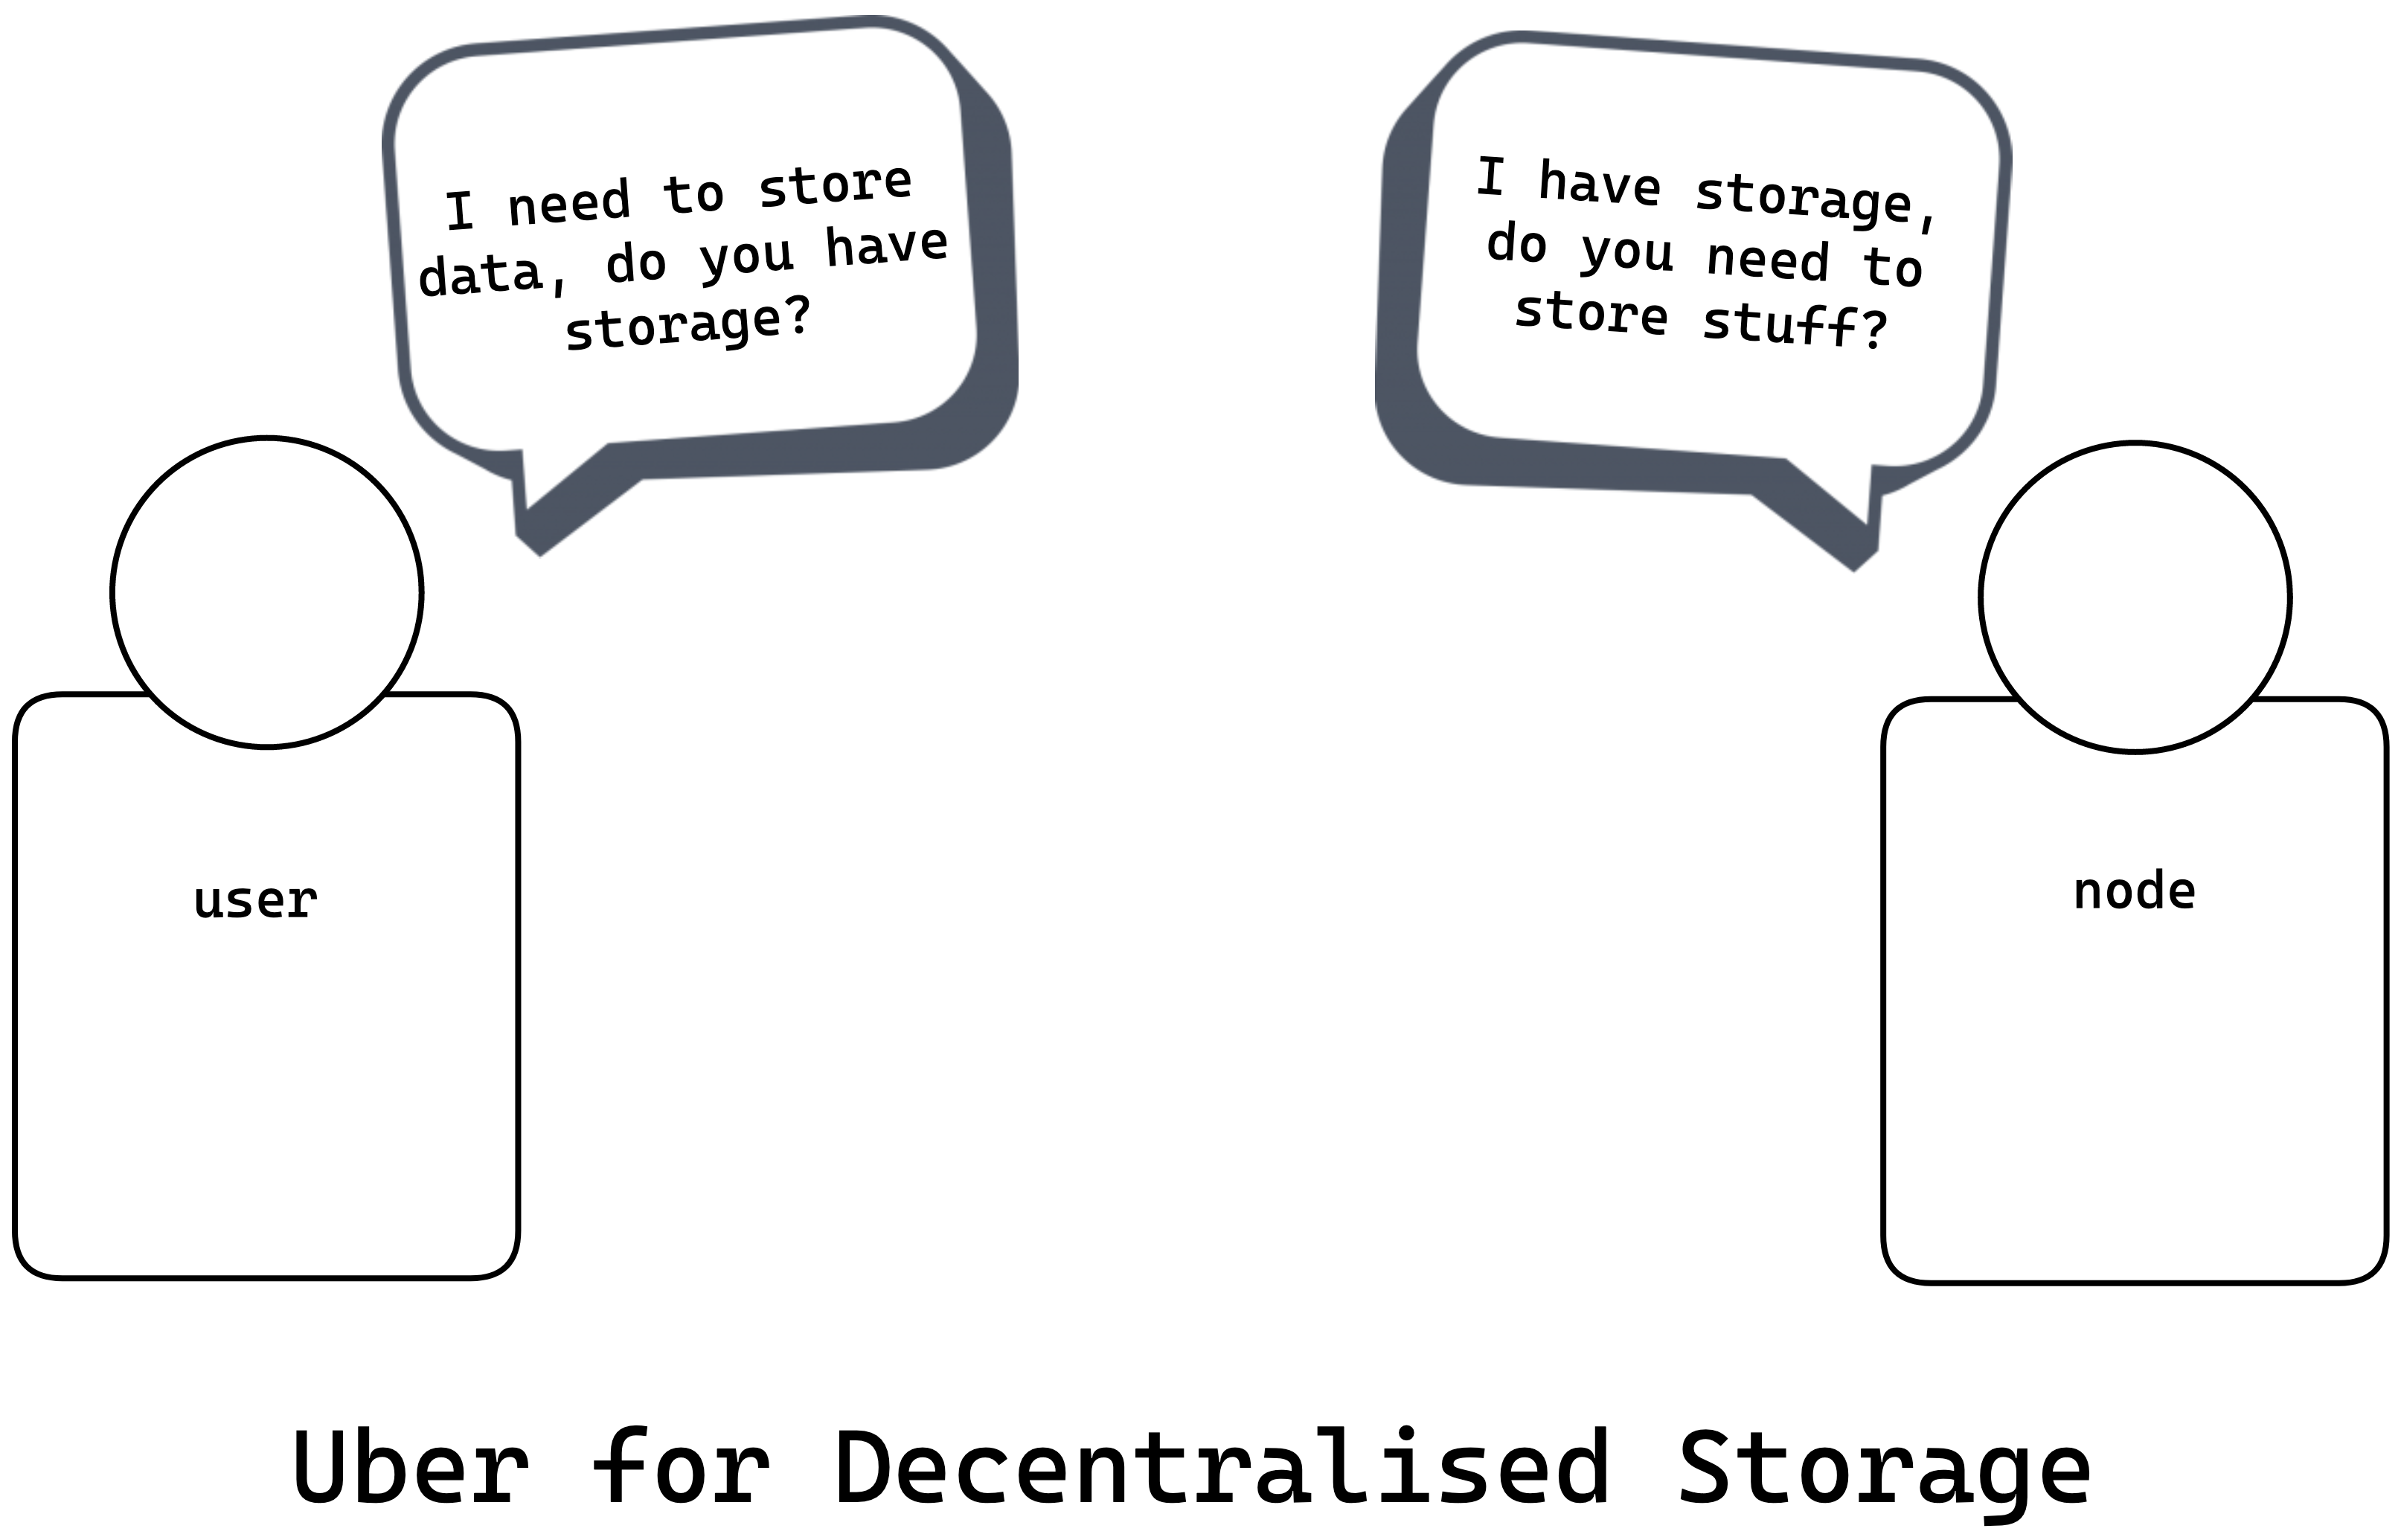
The protocol uses a decentralized network to store data, and it is backed by a storage endowment to ensure its perpetual availability. It works like Uber for decentralized storage by connecting people with hard drive space to spare with people needing to store data or host content permanently.
How does Arweave work?
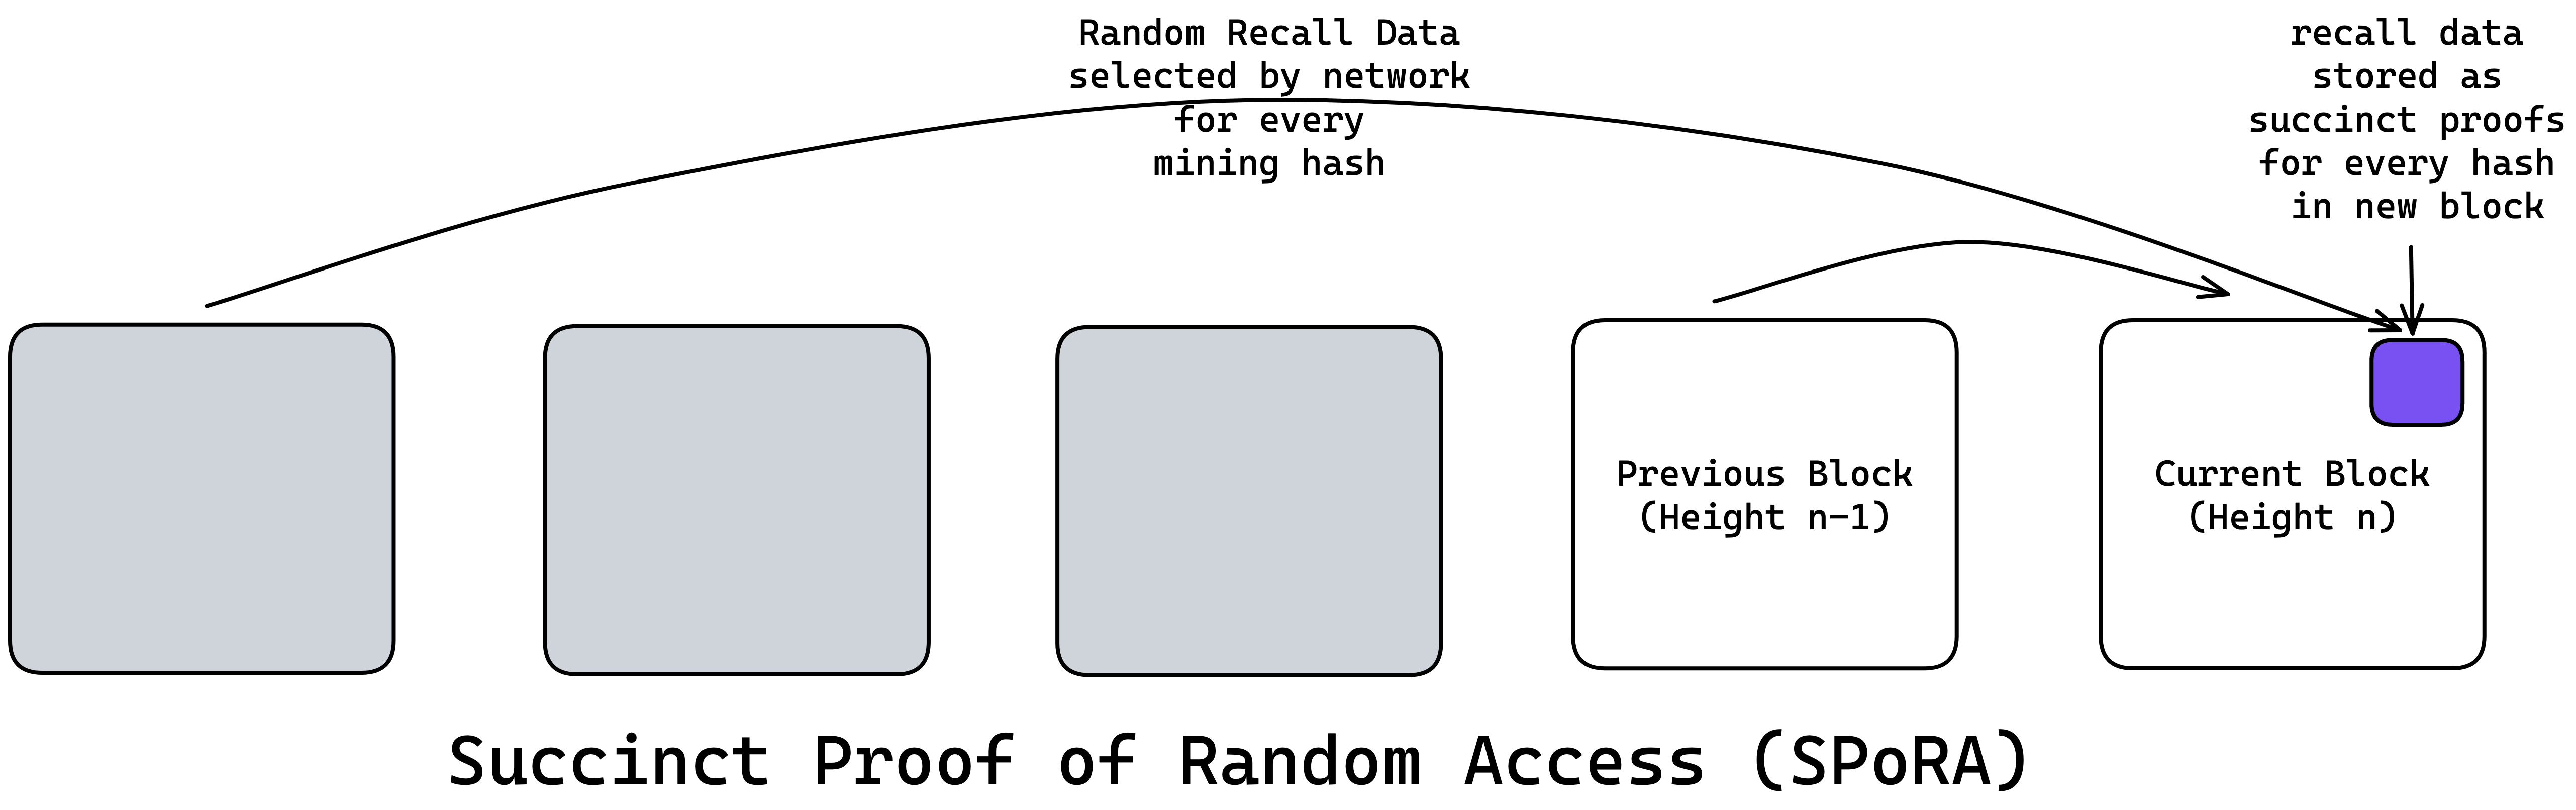
Arweave is a globally distributed network of miners all participating in the same network trying to sync state. The current mining mechanism used by the protocol to establish a decentralized network is called Succinct Proof of Random Access (SPoRA).
Unlike other networks where computing hashes is just a way of consuming energy, each hash computed on Arweave also requires a corresponding storage proof of a random chunk in the dataset. This incentivizes miners to store as much data as possible to increase their hash power.
As a way to incentivize the storage of network data, miners are required to produce proof that they have access to a random bit of recall data from the previous blocks of the network. This is known as the succinct proof and includes a branch path proving the miners have access to every byte of the random recall data requested by the network. It is a 256kB chunk stored in the new block as proof.
Moving away from energy-inefficient compute-based mining mechanisms and providing a fair chance to all miners to successfully produce new blocks, Arweave requires the hashes to be computed using general-purpose CPUs.
Additionally, miners are required to produce succinct proofs for every hash, limiting the speed of producing successful blocks to the speed of being able to produce proofs. This incentivizes the miners to store full copies of the network data locally for fast access to recall data for having a better chance of successfully producing hashes for a new block.
Taking another step towards incentivizing data storage, the mechanism adds a cryptographic speed limit to the number of hashes a miner can produce in a second (~ 800 hashes/ s maximum). Every set of hashes released to a miner is linked to a replica of the network data stored by them. To improve their chances of successfully adding a new block to the network miners must store more replicas of the data to receive more hashes.
Using the mechanisms described above Arweave receives the following benefits
lowering the barrier for onboarding miners and giving them a fair chance at successfully producing new blocks to the network by using general-purpose computing tools and mechanisms.
this in turn furthers network decentralization and data replication.
the model for storage-based mining mechanisms promotes organic network scalability eco-friendly manner.
The next evolution of the web!
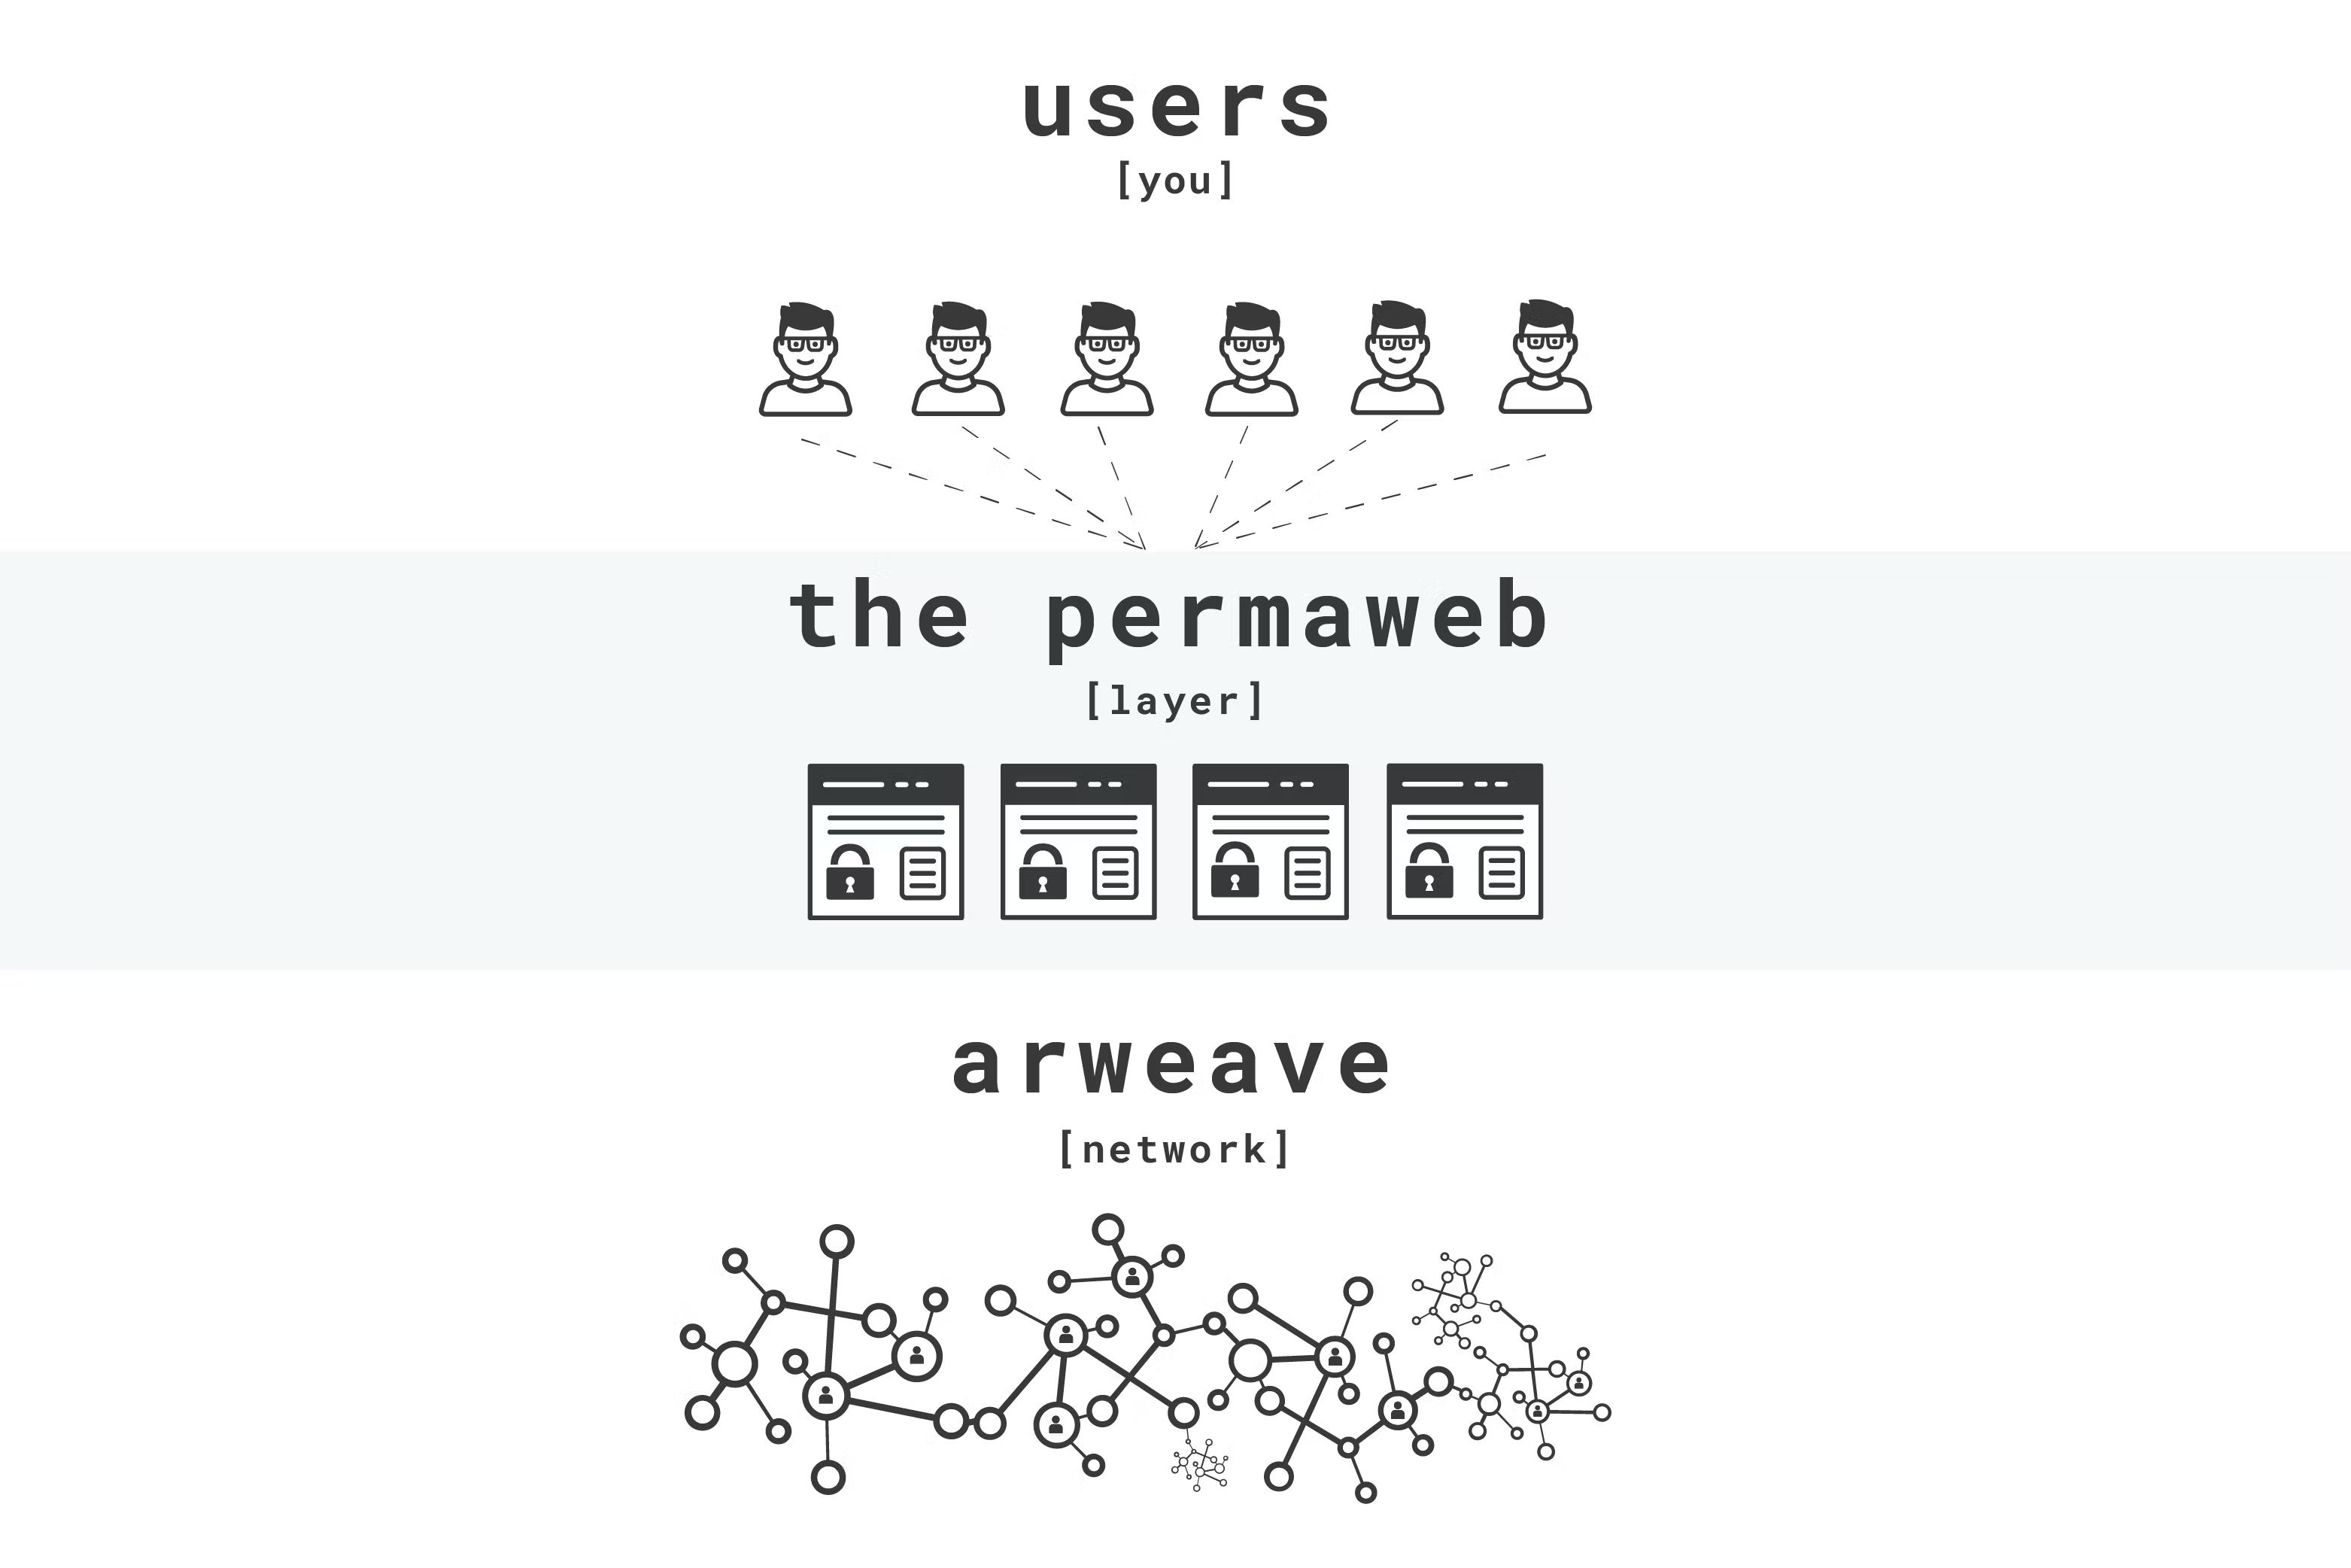
On top of Arweave is a layer called the permaweb that looks like the traditional web but enables storage of any data and hosting web apps in a permanent and decentralized manner while requiring low-cost and zero maintenance.
In the past, we’ve seen cases of article censorship or withdrawal by controlling authorities. News updates or modifications of the agenda are common practices, but this means crucial history and context are lost. Content creators receive inadequate attribution and/ or compensation due to intermediaries like distributors and publishers. Agreements require an intermediate element of trust among parties and fall through if one or more parties do not keep their end of the deal. These are just a few examples of intermediaries tampering with information.
But all of this can be solved by eliminating the intermediaries with the help of a resilient knowledge base, the Permaweb.
Any piece of information stored on the Permaweb is permanent with multiple replicas existing to deliver this information to anyone seeking it. The information is immutable, it cannot be censored, removed or modified. Since everyone can view this information, and track any attempts at modification, it is trustless (does not require placing trust in any party).
A decentralized network of gateway servers on top of Arweave makes information on the Permaweb easily accessible to traditional web browsers, without needing any modification or use of specialist software. Every bit of information is stored as a transaction id and it can be read by simply searching for a URL like https://arweave.net/transaction_id on any browser.
The one-time low-cost storage fee lowers the financial barriers for users to upload and share their content with the network. Additionally, as every transaction is linked directly to the user/ creator, they are guaranteed their due credit and smart contracts ensure the right parties get their fair share of compensation without any intermediation. Smart contracts execute agreements as defined logically, irrespective of the parties involved.
Leveraging the benefits of this network, let’s build a decentralized image-sharing service on Arweave and learn about the various concepts and components that go into building one along the way. We will call this ArGram!
ArGram: An Overview
Before delving into the programming aspect, let’s get an overview of the key concepts and components and the tech stack we will use to bring the application to life.
Key Components
Developing a robust application consists of two primary elements: the backend and the front end. The following sections detail the coverage of each aspect:
Backend Development: This element is responsible for data storage, logic implementation for modifications, unique functional patterns, and adherence to particular standards. As we dive into backend development, we will:
Gain an understanding of the Smart Contract Logic and the deployment process on Arweave.
Learn about a distinct data type called Atomic Assets, and examine its role as the foundational block for our application.
Frontend Development: This area focuses on creating an intuitive user interface and seamless user experience. It facilitates easy interaction with the network through the backend. In this section, we will deal with logic for network interaction. As we construct the frontend, we will delve into:
Implementing user authentication on a dedicated landing page and navigation component.
Crafting a function for creating a post as an atomic asset and interacting with it from a frontend interface.
Designing a function to retrieve posts and a corresponding frontend interface for their display.
Establishing functions to facilitate comments and likes on existing posts.
The Tech Stack
We will utilize the following tools to create the application described in the overview:
JavaScript: The programming language that we will use as the basis for both frontend and backend development.
PermawebJS: A one-stop library lowering the barrier to building on Arweave. This tool will help us interact with the network in just a few lines of code.
Othent: A library to seamlessly onboard users from web2 to web3 by facilitating account abstraction.
Svelte + Vite : Frontend tools for a seamless development experience to create lightweight applications with optimized performance.
TailwindCSS: A CSS framework will enable us to apply visually appealing styles and enhance the overall user experience.
GraphQL: An efficient, powerful, and flexible query language for posting requests to the network using the HTTP protocol.
ArGram: The Build
Now that we have an understanding of the concepts and tools that’ll go into building this process let us start building.
⚠️ Note: We will be working with GitHub. Create a new account, if needed.
We have a starter repo prepared with some initial setup like configs, dependencies and assistive code.
⚠️ Note: Supporting commentary has been added throughout the starter repo for ease of understanding of existing code and highlighting areas for writing new code.
Let us fork this repository by clicking the 'fork' button at the top-right of the linked page. On the following page, ensure the main-branch-only prompt from GitHub is checked.
After forking, you will be redirected to the forked repository on your profile. Click on the “Code” dropdown (on the right-hand side) to fetch the repository link and clone with the command line as follows:
git clone https://github.com/ropats16/argram-starter
⚠️ Note: Remember to replace the link in the code block with the link of your cloned repository. Your forked repository link will look like
https://github.com/{your_username}/argram-starter.
Now let's open the repository in our text editor and install the dependencies by running the following command in the command line:
npm install

#or

yarn
⚠️ Note: For help setting up GitHub with VSCode refer to this guide.
With the editor setup, we can get cracking.
⚠️ Note: Throughout this article, code blocks include comments for additional reference and assistance in placing new code blocks between the existing blocks. No code needs to be deleted or replaced unless specified. Dropdowns help understand the final code for a component. Keep an eye out for them! Use the final repo linked here as a reference if stuck.
Introduction to Backend Development
Smart Contracts on Arweave have a unique evaluation mechanism known as Lazy Evaluation. Through this, the burden of evaluating contracts and interactions is shifted from the nodes to the users.
For performing interactions with an existing contract, a user must first evaluate the previous interaction (every write interaction is a transaction) of the contract with the help of the contract logic and initial state and receive the current state. Upon receiving the current state, the user can evaluate and send a request for the new interaction.
From this evaluation mechanism, arises a functional pattern wherein the contract logic can be defined once and stored on-chain as the source logic.
Instances of this source contract can be created with different initial states. These instances can also have different sets of interactions leading to unique current states. A few benefits of this pattern are efficiency, modularity and scalability.
The contract logic does not need to be redefined for each instance. Every instance is linked to the contract source by the contract source’s transaction id and it can refer to the source logic at the time of evaluation.
For this workshop, we have already defined the logic for the contract source. Let’s have a look at it and understand what it means.
Defining the Contract Source
As mentioned earlier we are going to use a distinct data type, Atomic Assets, for our posts and keep the community standard for the contract source of Atomic Asset in mind with some slight modifications. The reason we are using this type is because of 3 distinct features of it:
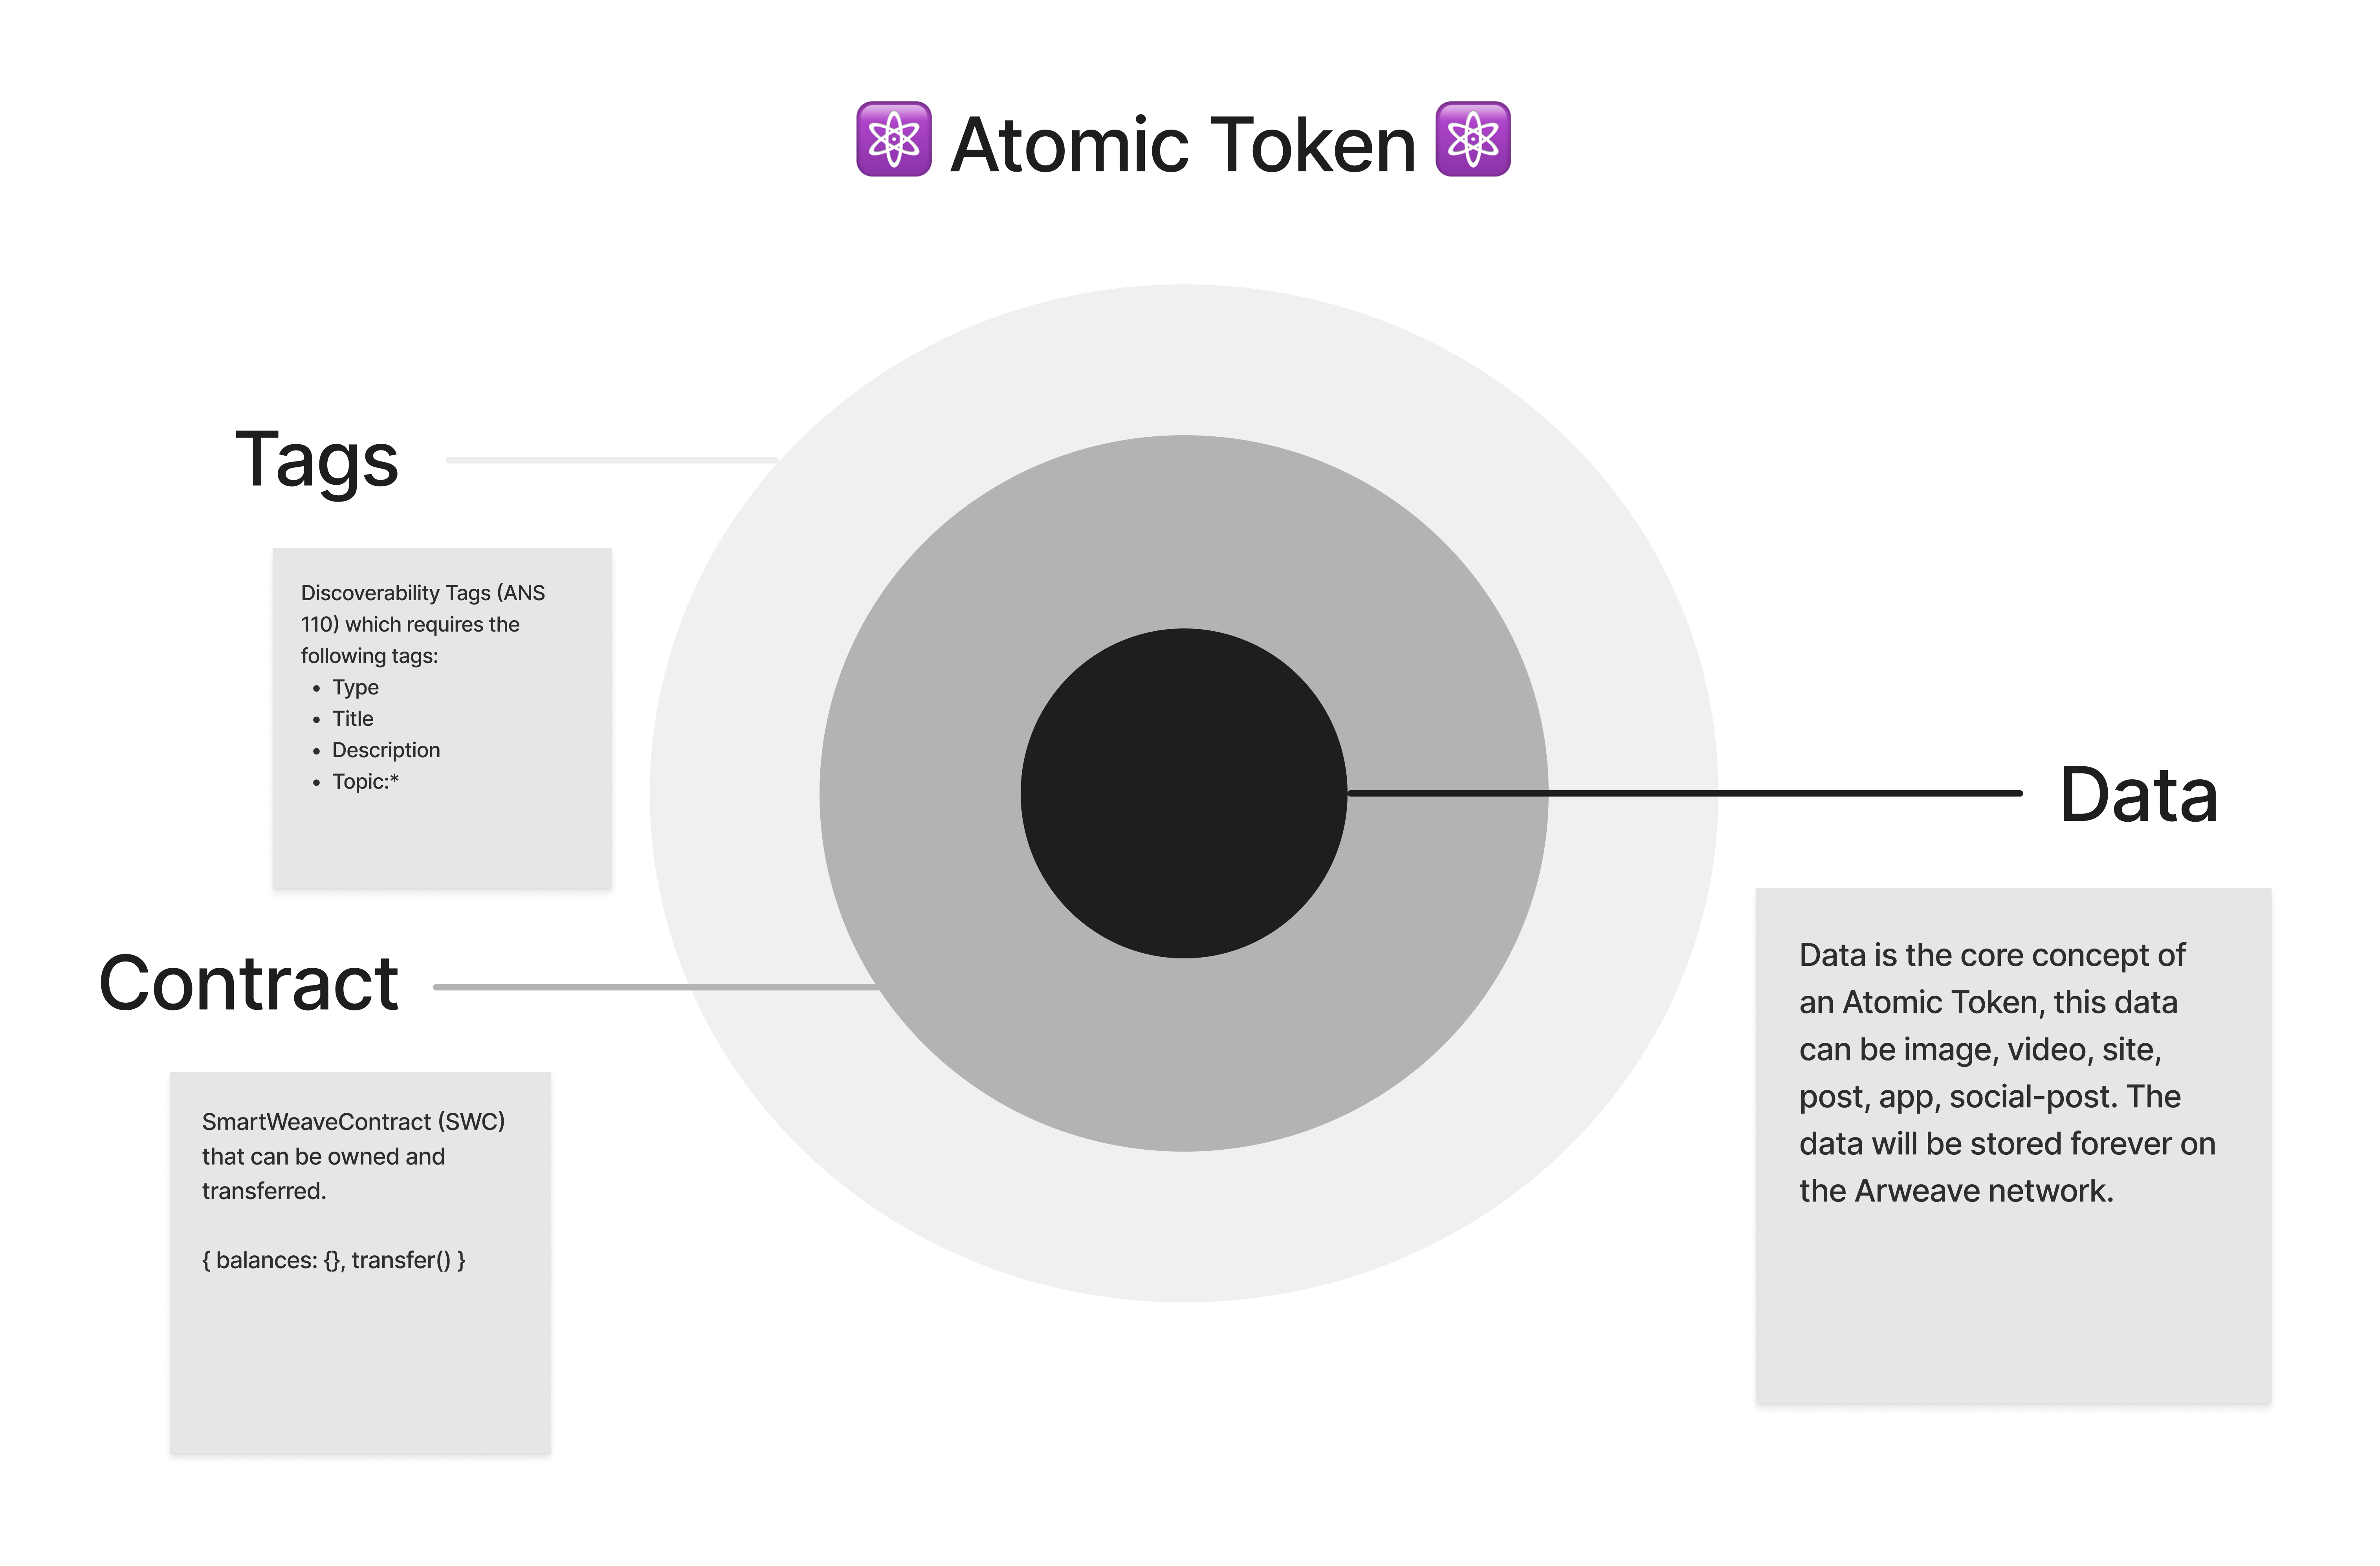
Any data and the logic to modify the data point to the same transaction id. Thus we can modify the information associated with our posts and give the users the ability to add comments, among other features. The data is stored as part of the state and each time we request to modify the data, the state gets updated.
It relies on ANS-110 standards for asset discoverability. Which means the data has tags associated with it. There are standard tags like
Title,Description,Type, andCreator, but we can also pass in custom types. So any metadata associated with our posts is stored as a tag on the post itself. This helps with easier data indexing and querying on the network.Lastly, an Atomic Asset must have the ability to be owned and transferred (so the contract should have functions to get the owner, balances of the owner, and transfer ownership). This can be used to trade assets or share ownership for the same, among other use cases.
To be able to create Atomic Assets we start with a contract source. The logic for the contract source can be found in src/contract/handle.js:
// handle.js

export async function handle(state, action) {
  const { input, caller } = action;

    // contract functions' definitions...

}
Every SmartWeave contract in JavaScript follows the pattern above for definition and takes in the state and action as input params. While the state is fetched directly from the network, the action is passed in by the user calling a function (caller) and has two elements:
The
inputswhich we pass in as an object at the time of the function call from the frontendthe
callerwho makes the function request and is detected by the network
  // function to get owner
  if (input.function === 'getOwner') {
    return { result: state.owner }
  }
If the function passed in as input is getOwner the contract executes the code within the if condition, returning the current owner of the contract. The user only needs to pass in the function name as an input for this function. The owner is initially set at the time of creating the contract instance but ownership can be transferred with the transfer function.
  // function to get balances
  if (input.function === "balance") {
    let target;
    if (!input.target) {
      target = caller;
    } else {
      target = input.target;
    }
    const ticker = state.ticker;

    ContractAssert(typeof target === "string", "Must specify target to get balance for.")
    ContractAssert(typeof balances[target] === "number", "Cannot get balance; target does not exist.")

    return {
      result: {
        target,
        ticker,
        balance: balances[target],
      },
    };
  }
balance gets a users balances for a given asset. The balances are set at the time of contract instance creation. They can be set greater than 1 as well and ownership can be shared among users by transferring a part of the balances.
The code block checks if a target user address has been passed in as an input and if so, then is it of type string. Else it assumes the target address is the caller. Once the target is defined, it checks whether the target has a balance and if they do then it returns that balance.
Both the getOwner and the balances function are read functions.
// functions to transfer ownership
  if (input.function === 'transfer') {
    const { qty, target } = input
    ContractAssert(target, 'target MUST be defined')
    ContractAssert(target !== caller, 'target can not be caller')
    ContractAssert(typeof qty === 'number', 'qty MUST be a number')
    ContractAssert(qty > 0, 'qty MUST be greater than zero')
    ContractAssert(Object.keys(balances).includes(caller))
    ContractAssert(balances[caller] >= qty, 'caller does not have enough qty')

    state.balances[caller] -= qty
    if (!state.balances[target]) {
      state.balances[target] = qty
    } else {
      state.balances[target] += qty
    }

    return { state }
  }
Every Atomic Asset can be transferred. The function caller must pass in the quantity of balance to be transferred and the target address. Then the function goes through a series of checks, namely, checking if the target is set, ensuring the target is not the function caller, the quantity passed in a positive non-zero number and that the caller actually has the balance they want to transfer. Upon clearing the checks, the balances are transferred from the caller to the target and the updated state is returned. The ability to fetch owners, their balances and transfer ownerships make Atomic Assets extremely powerful enabling them to create unique applications.
Then the function goes through a series of checks, namely, checking if the target is set, ensuring the target is not the function caller, the quantity passed in a positive non-zero number and that the caller actually has the balance they want to transfer. Upon clearing the checks, the balances are transferred from the caller to the target and the updated state is returned. The ability to fetch owners, their balances and transfer ownerships make Atomic Assets extremely powerful enabling them to create unique applications.
  // function to update comments
  if (input.function === 'addComment') {
    state.comments.push({ comment: input.txnData.comment, username: input.txnData.username, id: action.caller });
    return { state };
  }
The addComment function enables users to comment on posts just like any social media application. They take in the comment, username and the id of the user making the comment as part of a txnData object and store it as an object in an array of comments associated with the post. This array is initiated as part of the initial state at the time of contract instance creation.
// function to add likes
  if (input.function === 'likePost') {
    if (Object.keys(state.likes).includes(action.caller)) {

      throw new ContractError('User has voted!')
    } else {
      state.likes[caller] = Object.keys(state.likes).length + 1;

      return { state };
    }
  }
The likePost function gives the users to “like” the post. It begins with a check to see if the caller of this function has already liked a post. If not, the users id and like number as stored as key-value pairs in the state as part of the likes object.
else {
    throw new ContractError('Unrecognised function \\"' + input.function + '\\"');
  }
Lastly, the contract throws an error if an invalid function call is made.
Understanding the SmartWeave Contract Syntax
The syntax for SmartWeave contracts is based on reducer functions. They take in an accumulator (state) and an array of actions and run through each action, updating the value of the accumulator until the process is reduced to a single value.
For example, if we had an array of actions that had a function and value and the initial state of the contract was 0 as follows:
actions = [ (sum, 1), (sum, 2), (sum, 3) ]
initState = 0

async function handle (state, action) {
    if (function === 'sum') {
        state = state + input
    }
}
Each action would make a call to the sum function in the contract, and add the value passed in to update the state. So the actions would run as 0 + 1 = 1, 1 + 2 = 3, 3 + 3 = 6 which is how the current state 6 would be evaluated.
Deploying the Contract Source
Upon defining the contract source, the logic to deploy the contract source must be defined and run as a script to upload the contract source to Arweave. Developers building applications for users practice deploying the contract source from the command line, however, as this requires access to wallets and tokens, we’ve got you covered!
As a fun way of group participation in the workshop, we have deployed the contract source for you and added a common transactionId within our application so that we can view each other's posts and interact with them.
With this, we have our backend setup and we can move on to the frontend development.
Introduction to Frontend Development
Frameworks like NextJS and React are the popular choice for development traditionally, however, Svelte and Vite together enable the creation of lightweight applications that provide optimized performance with hot module replacement, enabling developers to see code changes in the browser without a full reload
Thus, for a seamless and stylized building experience, we have also added some supporting Svelte code along with CSS that will let us focus on the actual frontend logic of interacting with the network for posting and fetching data.
⚠️ Note: Comments have been added to highlight areas where we will work on the code. Additional comments explain the existing code. Any errors that may be visible on opening a file will be fixed as we continue to build our application.
Implementing User Authentication
We start with authentication for our users so that we can ensure users can create new posts or view existing posts only if they are logged in. The users can log in with the help of the connect button either from the Start (landing) page or the Navbar.
Let us start by handling the connection from the landing page first. We navigate to src/pages/start.svelte.
In the syntax pattern for svelte, all the interactive functionality (function logic) goes inside the <script> tags whereas any code for the presentation layer is found outside these tags.
However, we can use dynamic conditionals such as if/ else statements in the code for the visual layout as well, similar to frameworks like React and NextJS.
We begin by importing the packages to implement authentication:
// src/pages/start.svelte

<script>
    import { profile } from "../store.js";
    import { Othent } from "permawebjs/auth";

    async function handleConnect() {
    // write code for handling connection with app
  }
</script>

<!-- landing page ui... -->
profile is a cache variable that we have created beforehand. This helps us store the connected user profile in the cache until the user logs out or refreshes the application entirely.
One of the biggest barriers to the web3 ecosystem has been the technology needed to interact with these networks. This has kept consumer use cases limited and prevented masses from onboarding so far, despite the benefits that decentralization and permanence provide.
othent is a library that helps onboard masses to the ecosystem with just an email address or a Google account enabling users to interact with the network and on-chain dApps without the need for or knowledge of technologies like wallets and fees. permawebjs leverages this library under the hood for various functions including authentication.
For using othent with permawebjs you will need to fetch an API_KEY from othent.io.
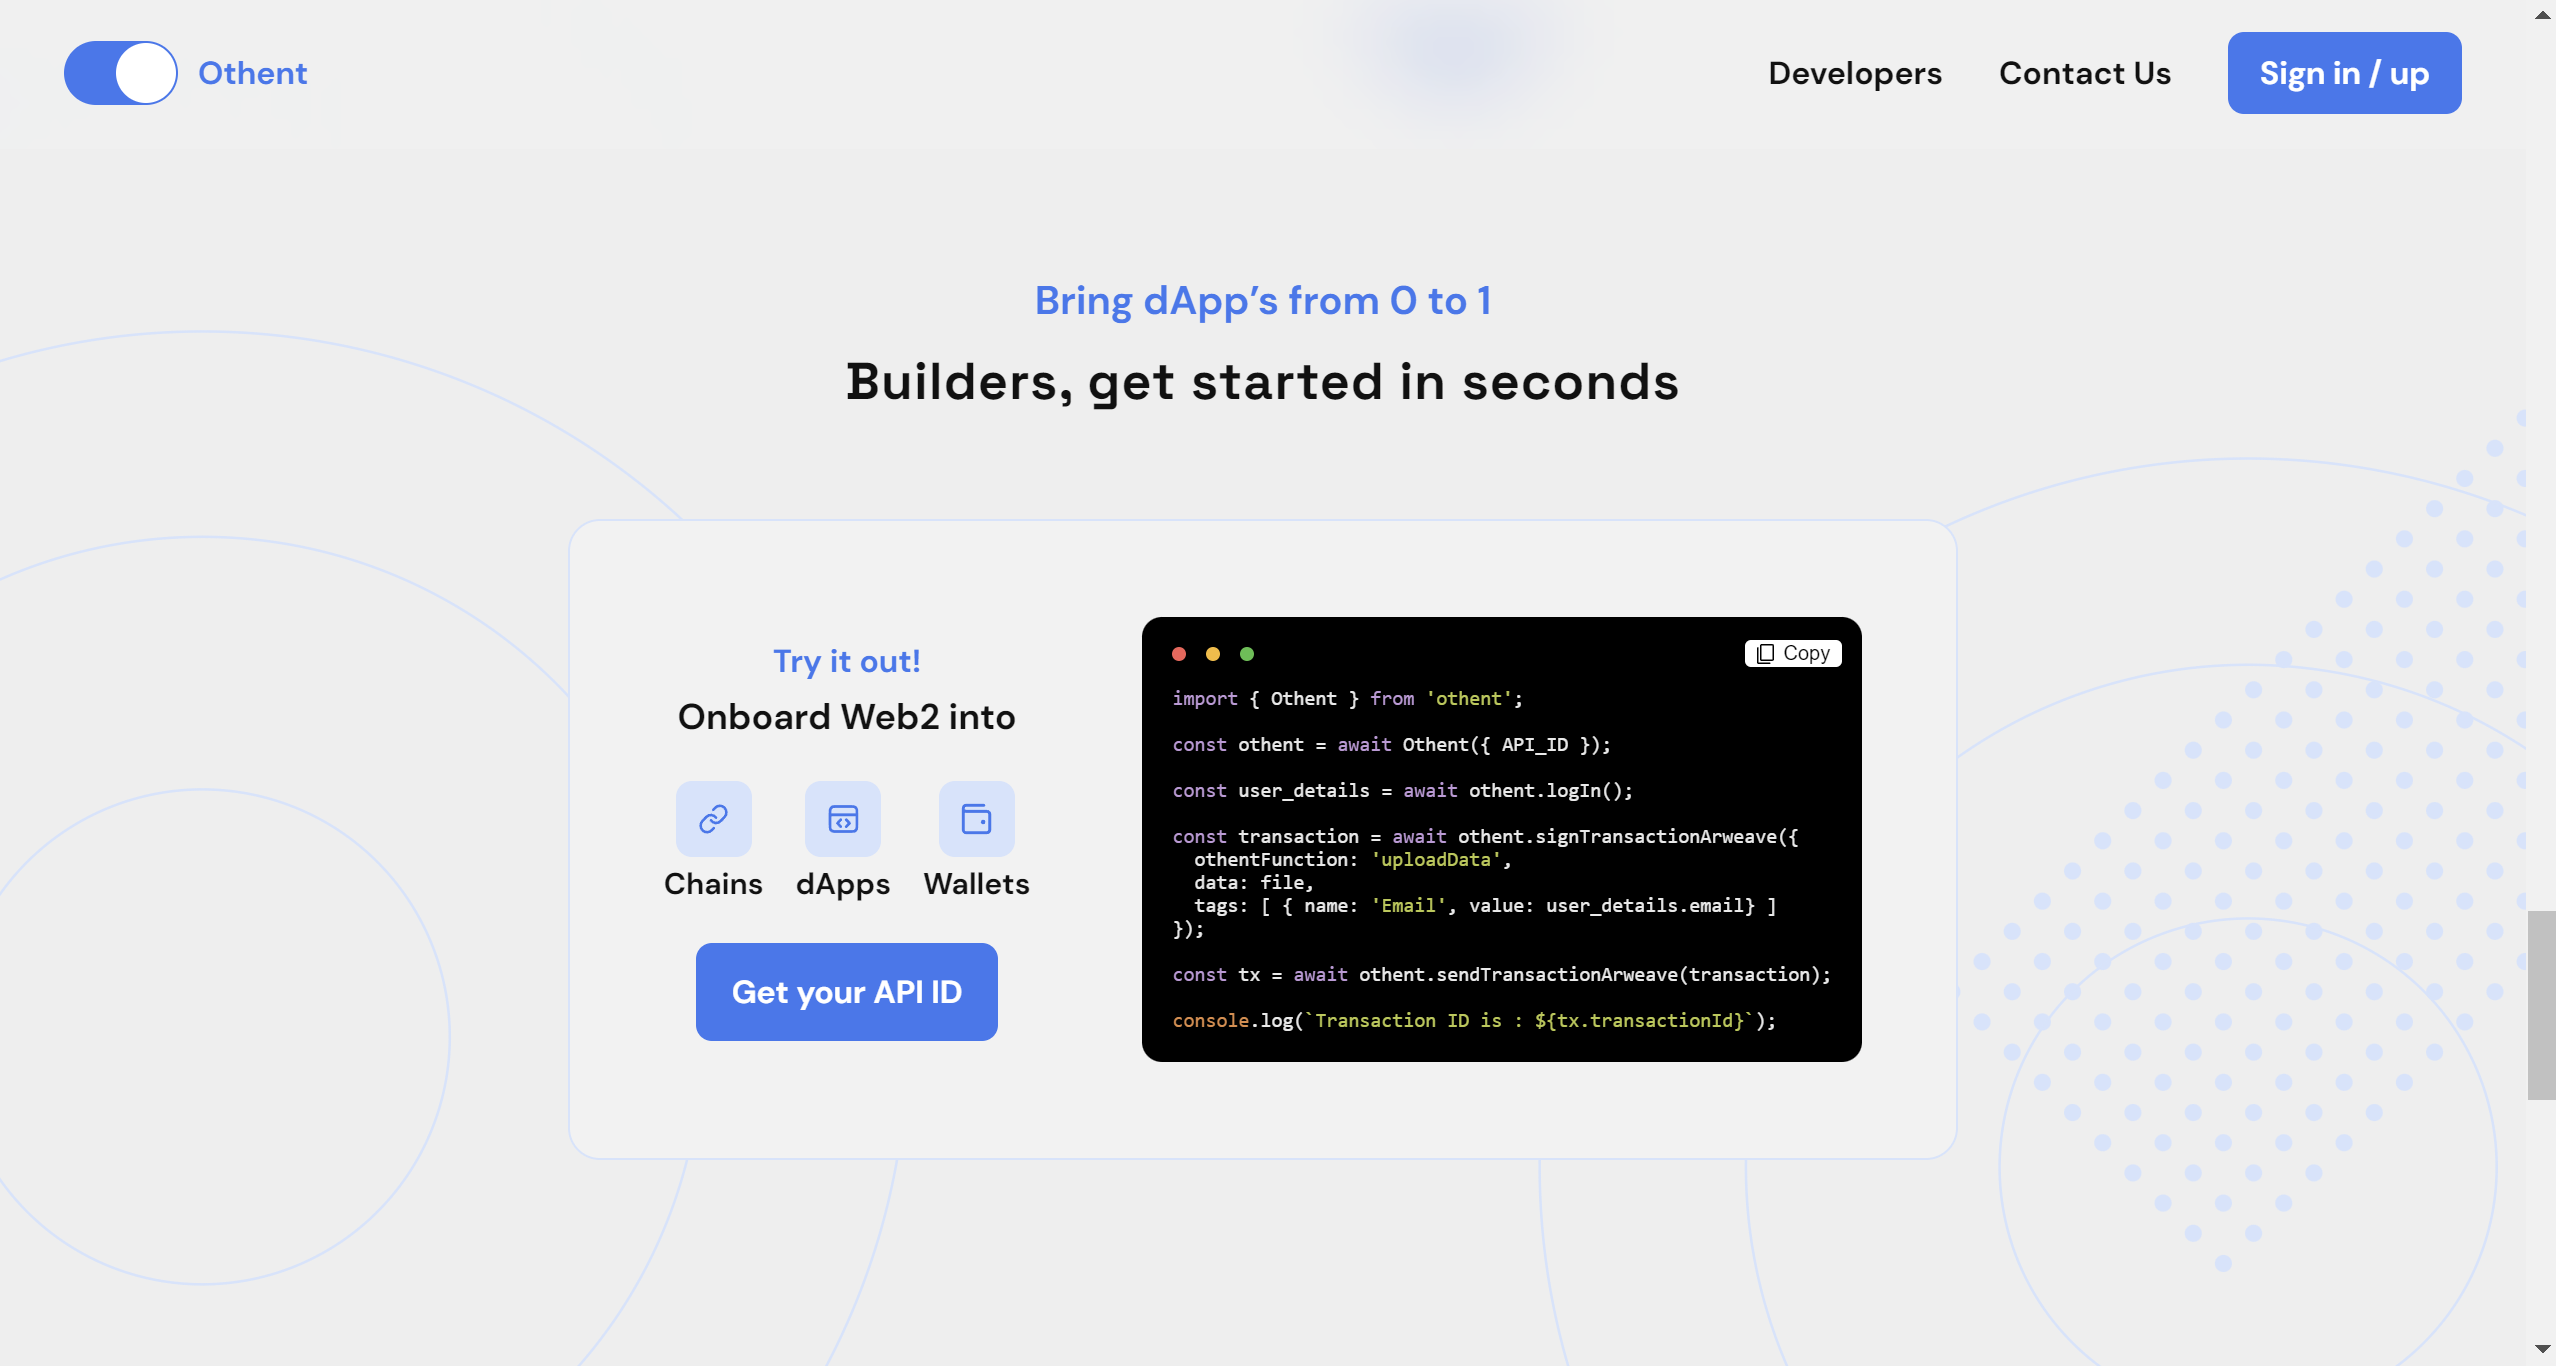
Sign-in with the button at the top right and then scroll down to the Get your API ID button seen in the image above. On clicking it a pop-up modal displaying your key opens. The modal also consists of a form to add a callback URL.

⚠️ Note: The
API IDhas been whited out in the image. It is important to keep your keys secure so that no one else can misuse them.
We will use https:/localhost:3000 as the callback for local development. Paste in the link and click the Add callback URL button.
// src/pages/start.svelte

<script>
// imports...

    // function to handle a user login
    // returns the user profile and stores it in $profile, a cache variable
    async function handleConnect() {
        $profile = await Othent.logIn({
          apiId: "YOUR_API_KEY",
        });
    }
</script>

<!-- landing page ui... -->
For connecting a user to the application, we simply call the logIn function as shown above in handleConnect. The logIn function also returns the details of the connected user which we store in our profile variable. The handleConnect is called on the frontend with the help of the connect button as follows:
// src/pages/start.svelte

<button class="btn btn-primary" on:click={handleConnect}>Connect</button>
First-time users go through a sign-up step, whereas pre-registered users will be able to sign in and their details will be stored in a cache variable to use in our application.
We want to implement the same function in src/components/navbar.svelte as well with a few more elements as follows:
// src/components/navbar.svelte

<script>
  import { profile } from "../store.js";
  import { Othent } from "permawebjs/auth";

  // function to handle a user login
  // returns the user profile and stores it in $profile, a cache variable
  async function handleConnect() {
    $profile = await Othent.logIn({
        apiId: "YOUR_API_KEY",
    });
  }

  // function to handle user logout
  // clears user profile information from cache
  async function handleDisconnect() {
    await Othent.logOut({
        apiId: "YOUR_API_KEY",
    });
    $profile = null;
  }
</script>

<!-- navbar component ui... -->
Additionally, the handleDisconnect function enables the users to log out of the application if already logged in.
If no user profile is stored in our application’s cache, the Navbar will display the log-in button, else the user name will be displayed which will serve as the log-out button calling the handleDisconnect function on click as follows:
{#if $profile}
  <!-- displays connected user's name from variable 'name' -->
  <!-- doubles as the log out button calling handle disconnect on click -->
  <button class="btn btn-ghost" on:click={handleDisconnect}>{$profile.name}</button>
{:else}
  <!-- connect button to handle log in -->
  <button on:click={handleConnect} class="btn btn-ghost">Connect</button>
{/if}
The syntax shown above is Svelte’s implementation of the if/ else statements within our presentation code. The general syntax for conditionals in Svelte between UI code is {#condition_name condition_logic} and it must end with {/condition_name}.
With the authentication setup done, let us start seeing this in action in our browser.
In the command line, run the dev command for running a local environment as follows:
# Command Line

npm run dev

#or

yarn dev
Then open http://localhost:3000/ in a browser to view the outcome.
We have preconfigured a stylized landing page for the same. It should look something like this:
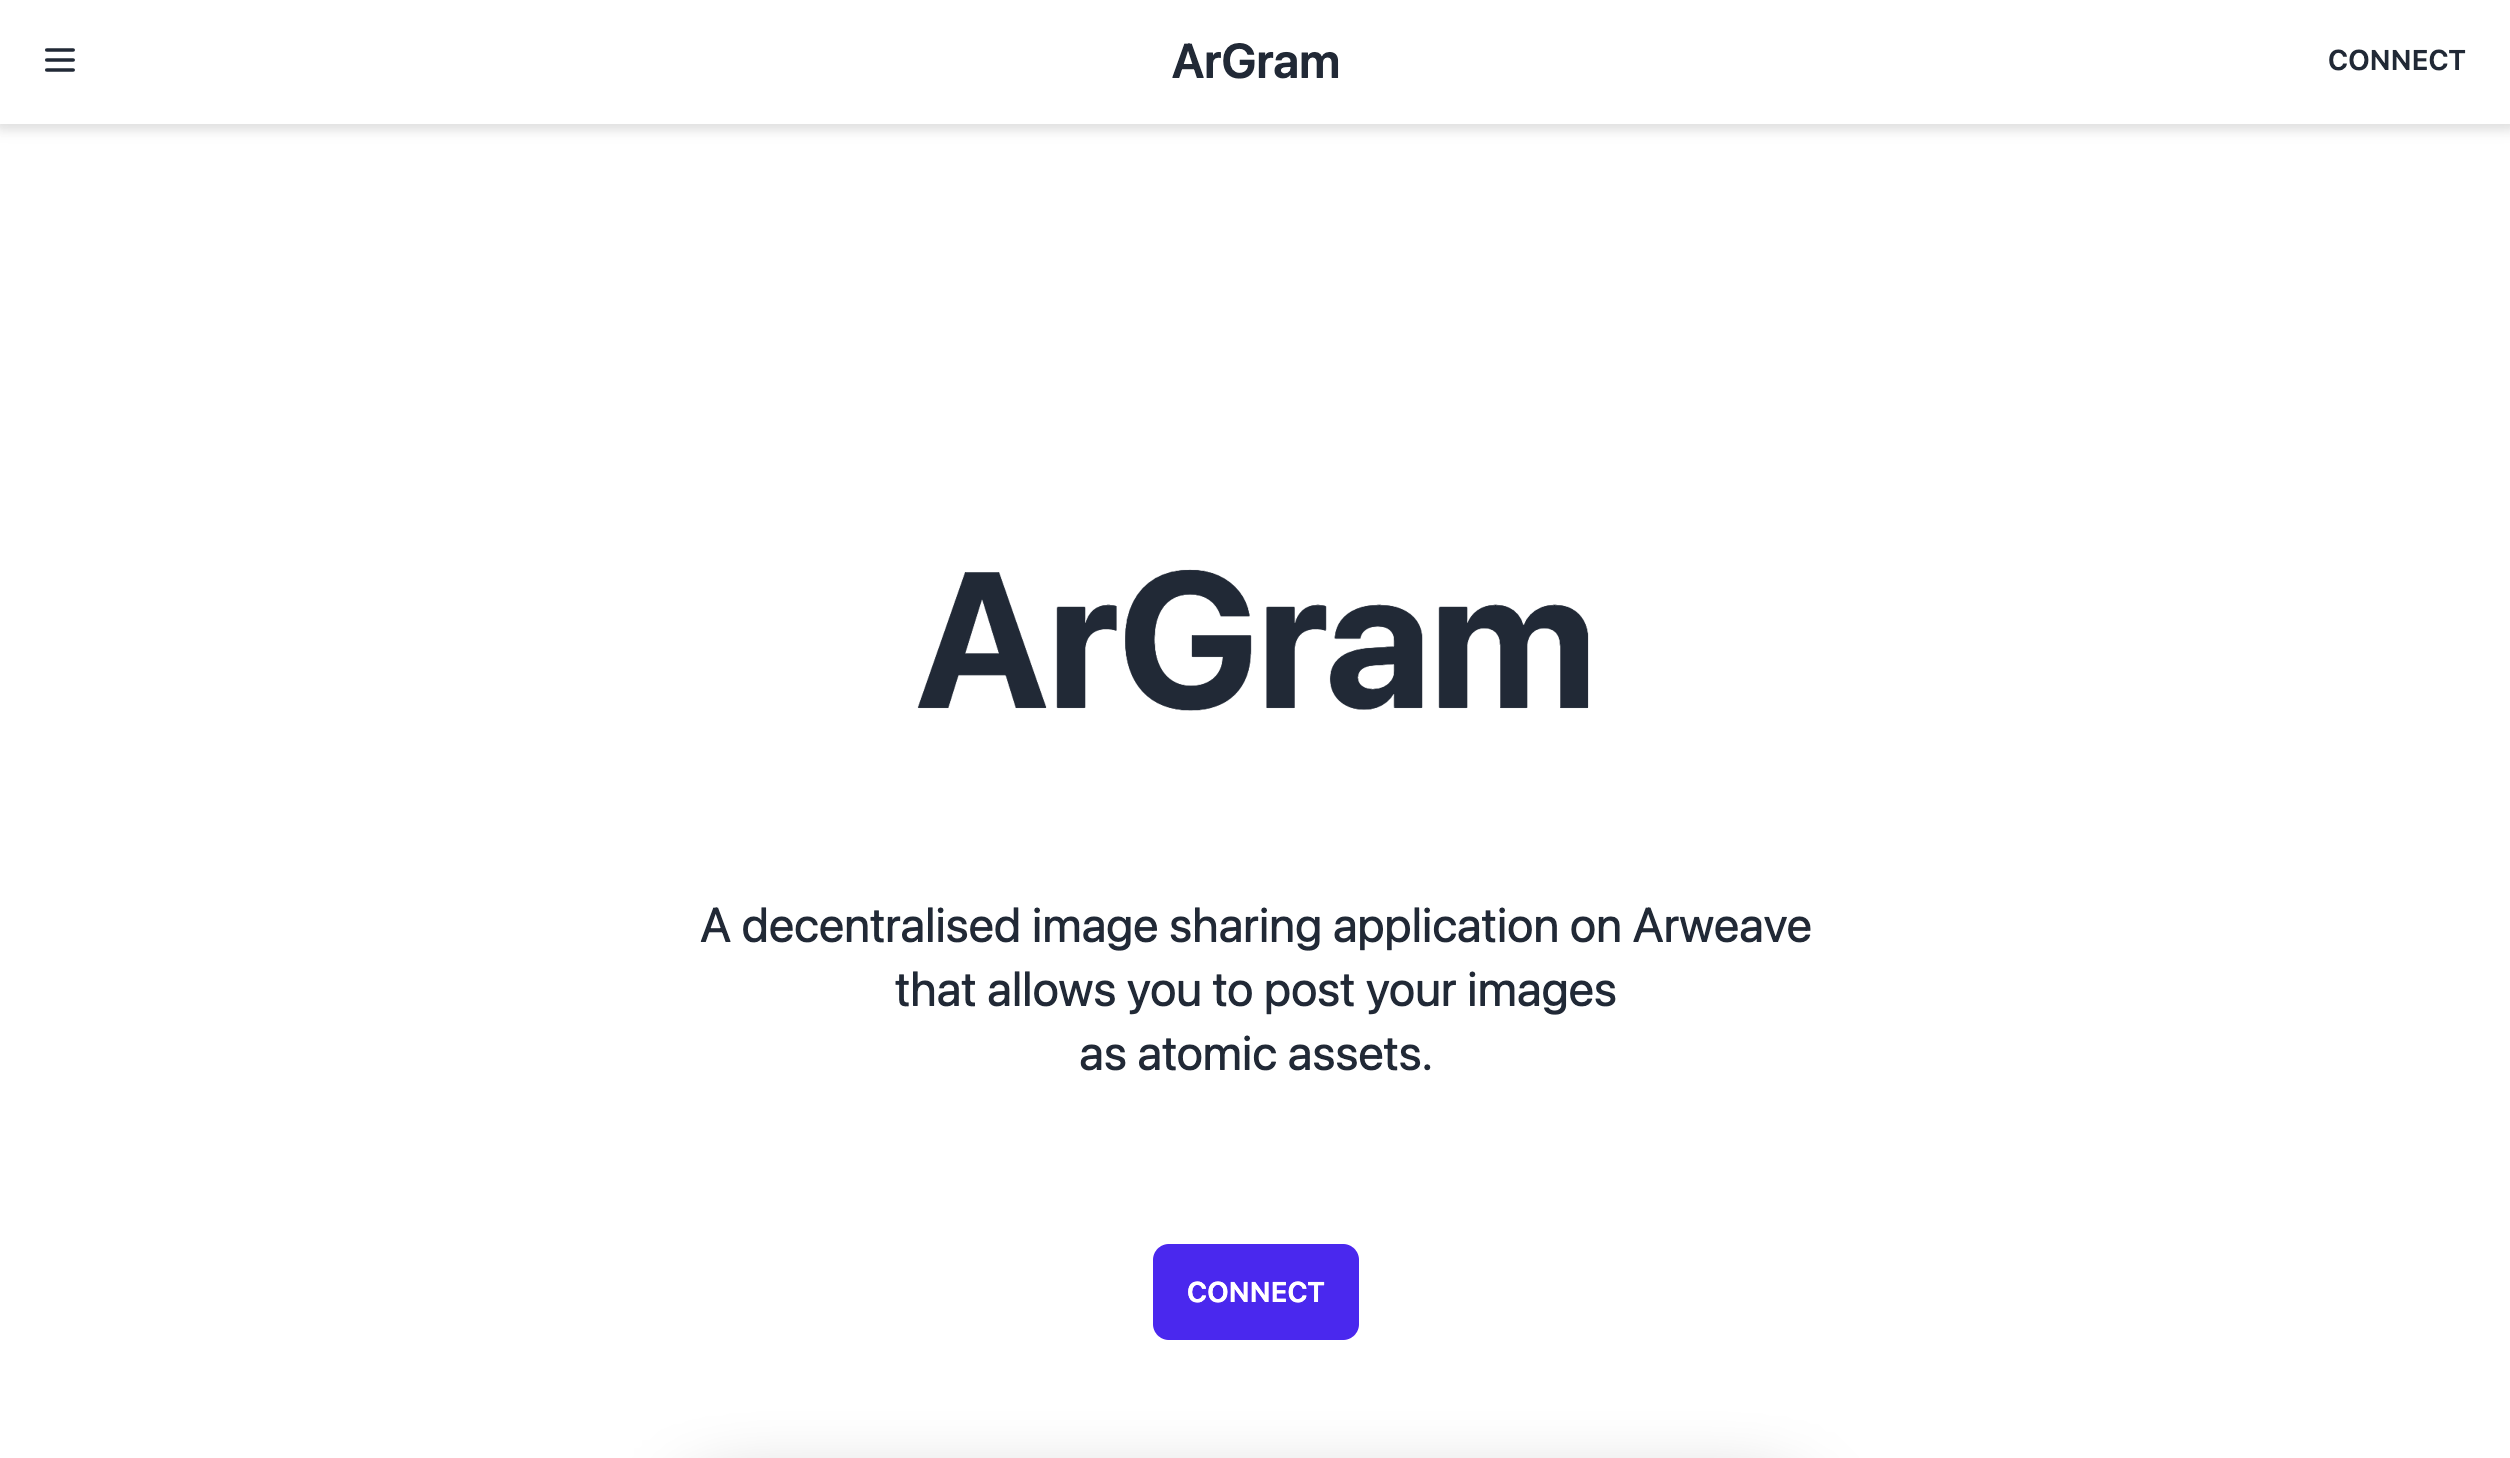
Great job! We have taken the first step to build a decentralized application on Arweave! 💻
We can now interact with the connect button and go through the authentication steps.
Upon successful connection, our application redirects users to the page for creating new posts (Upload page), by default. The Navbar component now displays the details of the user logged in and also serves as a button to log out of the application. The Navbar also has a navigation dropdown on the left-hand side to switch between the pages.
The Upload page has a form for users to post an image with a title, optional description and hashtags. Let’s create the supporting functions to make this form work.
Defining Logic to Create a Post (as an Atomic Asset)
For submitting the form, we must define a function to upload our post to the network as an instance of the contract source and then add some error handling to the frontend with the help of pop-up dialogue boxes.
Let’s begin by creating a new file named post.js in src/lib and creating a function named postAsset:
// src/lib/post.js

// function to post asset to network
// takes in 'asset' information
export async function postAsset(asset) {}
The function requires an asset parameter as input received from the user on the upload page. It will be indexed into file, title, description, topics, username and userid to pass in the appropriate values where needed in our code.
Now we work on taking our image and converting it to a format acceptable on Arweave:
// src/lib/post.js

// function to convert input image to type `ArrayBuffer`
// takes in image file
const toArrayBuffer = (file) =>
  new Promise((resolve, reject) => {
    const fr = new FileReader();
    fr.readAsArrayBuffer(file);
    fr.addEventListener("loadend", (evt) => {
      resolve(evt.target.result);
    });
  });

// function to post asset to network
// takes in 'asset' information
export async function postAsset(asset) {

    // converts file to `ArrayBuffer`
  const data = await toArrayBuffer(asset.file);

}
Arweave requires us to pass in data as a string, a Uint8Array or an ArrayBuffer. For this, we create a function named toArrayBuffer that converts our image file to the ArrayBuffer format.
// src/lib/post.js

// imports
import { split, map, trim } from "ramda";

// toArrayBuffer function...

// function to post asset to network
// takes in 'asset' information
export async function postAsset(asset) {

  // converts file to `ArrayBuffer`
  const data = await toArrayBuffer(asset.file);

  // array of input tags
  const inputTags = [
    // Content mime (media) type (For eg, "image/png")
    { name: "Content-Type", value: asset.file.type },
    // Help network identify post as SmartWeave Contract
    { name: "App-Name", value: "SmartWeaveContract" },
    { name: "App-Version", value: "0.3.0" },
    // Link post to contract source
    { name: "Contract-Src", value: SRC },
    // Initial state for our post (as a contract instance)
    {
      name: "Init-State",
      value: JSON.stringify({
        creator: asset.userid,
        owner: asset.userid,
        ticker: "ARGRAM-ASSET",
        balances: {
          [asset.userid]: 10000
        },
        contentType: asset.file.type,
        comments: [],
        likes: {},
      }),
    },
    { name: 'Creator-Name', value: asset.username },
    // Standard tags following ANS-110 standard for   discoverability of asset
    { name: 'Creator', value: asset.userid },
    { name: 'Title', value: asset.title },
    { name: 'Description', value: asset.description },
    { name: 'Type', value: 'image' },
  ];

  // adding hashtags passed in by users to the 'inputTags' array
  map(trim, split(',', asset.topics)).forEach(t => {
    inputTags.push({ name: 'Topic:' + t, value: t });
  });
}
Before posting our asset on the network, we create some tags for discoverability and as metadata:
Content-Typedefines the image mime type (For eg, "image/png", "image/svg").App-Namehelps the network identify the transaction as aSmartWeaveContractandApp-Versionis the recent version of the contract standard for the network.Contract-Srclinks the Atomic Asset to its contract source. This is the contract source id shared earlier.Init-Statedefines the initial state of the Atomic Assets and includes:the address of the
creatorof the asseta
tickerthat helps identify the application used to deploybalancesdefines the initial balance of the asset received by the owner. The balances can be a positive non-zero number.an empty array of
commentsand an empty oflikesfor users to post comments and add likes on existing posts, respectively. We will interact with each of these in the coming section.
Creator-Namedefines the user name received from the connected user profile by appending the user’s first and last names.As described earlier, Atomic Assets have a few tags as prescribed by ANS-110 (Asset Discoverability) such as
Creator,Title,DescriptionandTypeof the post.Lastly, we use the tools imported from
ramdato clean up the hashtags given as input by the user and post them as tags, as well.
With the tags defined, we define the function to post and create our Atomic Asset on the network. We do so using permawebjs' transaction function createAndPostTransactionWOthent. Similar to functions used previously, that leverage the othent protocol, this function enables users to upload data to Arweave using familiar technology (i.e. their email accounts).
// src/lib/post.js

// imports
import { split, map, trim } from "ramda";
import { WarpFactory } from "warp-contracts";
import { DeployPlugin } from "warp-contracts-plugin-deploy";
import { createAndPostTransactionWOthent } from "permawebjs/transaction";

const SRC = 'oKZ9sy4Am-_mj3PPO2_irfwoLhUzPtetwpPAhVupYgI';

// toArrayBuffer function defined...

// intiating new warp instance for mainnet
const warp = WarpFactory.forMainnet().use(new DeployPlugin());

// function to post asset to network
// takes in 'asset' information
export async function postAsset(asset) {

  // 'data' variable to ArrayBuffer...

  // 'inputTags' definition...

   // function call to create post using othent for signing
  const transaction = await createAndPostTransactionWOthent({
    apiId: "YOUR_API_KEY",
    othentFunction: 'uploadData',
    data: data,
    tags: inputTags,
    useBundlr: true
  });

  // registering transaction with warp
  await warp.register(transaction.transactionId, 'node1');

  // returns the success status and transaction id of the post
  return transaction;
}
The createAndPostTransactionWOthent function call needs some params for successfully uploading the post:
The
othentFunctionparameter informs the function on the backend that this interaction is a data upload request.The
datais the image file we converted to theArrayBufferformat.The
inputTagsare passed in during the function call, as well.Lastly, we set the
useBundlroption totrueindicating we want to upload the data on Arweave through Bundlr.
A successful function call returns the success status and transactionId of the interaction as part of the transaction object.
We widen accessibility to our transactions by registering them with Warp protocol using the call to warp.register().
Once registered, we can search for the transactionId on the Sonar block Explorer (Warp's native explorer) to view the contract code, tags and some additional information.
Registering the transaction will also assist us to evaluate a post's latest state and visualize future interactions (comments and likes) promptly.
Connecting the Post Function to Form
After defining the logic for creating an Atomic Asset, we work on adding interactive functionality and error handling in src/pages/upload.svelte. In the Upload page we have some predefined assistive imports, variables and code for rendering the upload form.
// src/lib/upload.svelte

<script>
// imports
  import { postAsset } from "../lib/post";
  import Deploy from "../dialogs/deploy.svelte";
  import Error from "../dialogs/error.svelte";
  import Confirm from "../dialogs/confirm.svelte";
  import { profile } from "../store";

  // variables for storing user inputs for post
  let files;
  let title = "";
  let description = "";
  let topics = "";

  // pop dialog boxes for status updates
  let deployDlg = false;
  let errorMessage = "";
  let errorDlg = false;
  let confirmDlg = false;

  // checks for valid file and title input to enable post button
  $: notValid = !(files && title !== "");

  async function createPost(e) {
    // write code to call postAsset function from `post.js` and create new post
  }
</script>

<!-- upload page ui -->
The createPost function is linked to the input form for receiving information like image, title, description and hashtags from the user. The username and userid are fetched from the logged-in user’s profile.
The $: notValid reactive (dynamic) variable keeps a check on whether a valid file and title have been passed in, until then, the deploy button on the form is disabled as follows: <button disabled={notValid} class="btn btn-block">Deploy</button>
// src/lib/upload.svelte

<script>
  // imports and variable declarations...

  async function createPost(e) {
    // creates asset object with user inputs
    const asset = {
      file: files[0],
      title,
      description,
      topics,
      username: $profile.name,
      userid: $profile.contract_id,
    };
  }
</script>

<!-- upload page ui -->
We create a temp object named asset that stores information from user inputs in the UI and the connected user profile and then we call the postAsset function.
// src/lib/upload.svelte

<script>

// imports and variable declarations...

    async function createPost(e) {
    // 'asset' object defintion...

    try {
      // opens pop up showing posting in progress
      deployDlg = true;

      // function call to 'postAsset' function passing in created 'asset' object
      const result = await postAsset(asset);

      // closes progress pop up on successful post and resets user inputs
      deployDlg = false;
      e.target.reset();
      files = [];

      // opens up post success pop up
      confirmDlg = true;
    } catch (e) {
      // error handling to display error in pop up
      deployDlg = false;
      errorMessage = e.message;
      errorDlg = true;
    }
  }
</script>

<!-- upload page ui -->
We use a trycatch conditional to call the postAsset function defined earlier and use supporting dialogs to indicate whether the deployment is under way, confirmed or an error has occurred.
On running the try conditional, the deploy dialog opens up indicating the posting action is in progress and a function call to the postAsset function is made by passing in the temporary variable asset as a parameter. If the function is successful, the deploy dialog box shuts, the input data from the form is reset and the confirmation dialog pops up.
The confirmation dialog box links to view the created post.
If an error occurs, the function exits the try conditional moving to the catch and displaying a dialog box with the received error. Give it a try!

Kudos on creating a working form for creating posts to the network! 🖼️
Querying the Network for Posts
Now that we have posts, we want to view them. Data on Arweave is publicly accessible to all and can be queried with the help of endpoints. For querying this data we will use GraphQL, a querying language that passes requests to the endpoints. The queries are passed in the form of custom schemas and the tags defined earlier help with the same.
We have predefined a custom query schema and request in src/lib/queryAsset.js. Let’s understand the code housed in the file.
The Schema
At the bottom of the file, we have the query schema we want to pass into the endpoint for requesting the posts we have created.
We will replace the empty code block asking for query tags with the following code in the schema:
// src/lib/queryAsset.js

// predefined getAssetData function

// query requesting posts referencing the defined contract source
function idQuery() {
  return `
query {
  transactions(tags: [
      { name: "Contract-Src", values: ["oKZ9sy4Am-_mj3PPO2_irfwoLhUzPtetwpPAhVupYgI"] }
    ]) {
    edges {
      node {
        id
        owner {
          address
        }
        tags {
          name
          value
        }
        block {
          timestamp
        }
      }
    }
  }
}
`
}
⚠️ Note: It is important to maintain the tags within the
returnstatement. It is the required format for passing a query successfully to the request.
This query tells the network to fetch and return transactions having the tags Contract-Src with the value equal to the transaction id of the contract source deployed in this walkthrough.
At the time of creating a post, we had passed in the Contract-Src as a tag for discoverability. This will help the query return the posts that have been created from our contract source.
As seen earlier, at the time of input tags definition, tags help us create custom queries for asset discoverability. This can help query for transactions with specific tags such as requesting posts by specific creators tags, specific asset type tags, timestamps, etc.
Posting the Query
After defining the query schema, we make the actual request and clean up the data received:
// src/lib/queryAsset.js

// imports
import { prop, propEq, find, pluck, filter } from 'ramda';

// function to fetch posts create from defined contract source
export async function getAssetData() {
  // initialising empty array
  let assets = []

  // fetch request
  await fetch(`https://arweave.net/graphql`, {
    method: 'POST',
    headers: {
      'Content-Type': 'application/json'
    },
    body: JSON.stringify({ query: idQuery() })
  })
    // response cleanup
    .then(res => res.json())
    .then(({ data }) => Object.values(data.transactions))
    .then(edges => edges.map((node) => {
      node.map((sub) => {
        // creating object of relevant data for each asset and pushing to 'assets' array
        // contains transaction id, web url for image, title, description, content type, topics (hashtags), post owner, timestamp
        assets.push({
          id: sub.node?.id,
          image: `https://arweave.net/${sub.node?.id}`,
          title: sub.node.tags.find(t => t.name === 'Title')?.value,
          description: sub.node.tags.find(t => t.name === 'Description')?.value,
          type: sub.node.tags.find(t => t.name === 'Type')?.value,
          topics: pluck('value', filter(t => t.name.includes('Topic:'), sub.node.tags)),
          owner: sub.node.tags.find(t => t.name === 'Creator')?.value || sub.node.owner.address,
          ownername: sub.node.tags.find(t => t.name === 'Creator-Name')?.value,
          timestamp: sub.node?.block?.timestamp || Date.now() / 1000
        });
      }
      )
    }))

  // returns 'assets' array on function call
  return assets
}

// query definition...
A fetch request with the HTTP method POST, sends a request to the network via the endpoint “https://arweave.net/graphql” and in exchange, the network responds with the requested information.
After a bit of cleanup, we receive an array of objects, each representing an Atomic Asset (post) with the block timestamp when it was posted to the network, the transactionId (id), the owner of the asset and the tags associated with it at the time of creation.
With the help of some ramda cleanup tools and the find method we cherry-pick the data we want and create an object of these key-value pairs for each asset:
idis the transaction id. Using this we also create a URL to view theimageposted. As seen earlier, in an Atomic Asset, the data and the contract to update it point to a single transaction id. Thus, looking up the URL on a web browser displays the image posted.The code
sub.node.tags.find(t =>t.name=== 'Title')?.valuesearches the tags received to find the keyTitleand return the associated value. Similarly, we filter the values forDescription,TypeandTopics.Additionally, we pass in the
ownerid,ownernameand thetimestampof the asset.
The data object for every asset is passed to the assets array defined in the function and this array is returned on calling the getAssetData function call.
Rendering the Queried Posts
Finally, with the data queried we render the posts on the View page defined in src/pages/view.svelte.
// src/pages/view.svelte

<script>
  // imports
  import { getAssetData } from "../lib/queryAssets";
  import Comment from "../components/comment.svelte";
  import { take } from "ramda";
  import Like from "../components/like.svelte";

  // variable bound to getAssetData function
  let assetData = getAssetData();
</script>

<!-- view page ui... -->
We create a variable assetData assigning it the value of the function getAssetData defined earlier. Each time the variable is referenced, the function is called and its returned data.
// src/pages/view.svelte

<!-- view page ui... -->

    <!-- calls assetData variable -->
  <!-- call to assetData calls the 'getAssetData' function -->
  <!-- stores return value in temp var 'assets' -->
  {#await assetData then assets}

<!-- view page ui... -->
A dynamic call to the assetData variable within the rendering code triggers the getAssetData function and the value returned is stored in a temp variable named assets.
// src/pages/view.svelte

<!-- view page ui... -->

    <!-- ensures 'assets' has data -->
    {#if assets.length > 0}
      <div class="flex-col">
        <!-- maps over elements of 'assets' -->
        <!-- each element is given temp name 'asset' -->
        {#each assets as asset}

<!-- view page ui... -->
Check if the assets variable has any data. If it does, then every asset in the assets array is iterated upon and stored in a temp variable named asset :
Each asset is the dedicated object created from the getAssetData function. The key names of this object are referenced as asset.key_name to fetch and display their values. Using this syntax we display the image, title, description, timestamp and hashtags.
As every asset is iterated upon, we see a series of posts on the View Page. To navigate to the view page we can simply use the Navbar dropdown and select the View button.

Awesome! Another milestone accomplished! 🔍
Two other elements we see on posts are the option to post comments and like a post. Let’s start by giving our users the ability to comment on posts.
Defining Interactive Functionality for Comments on Posts
Every post has a dedicated comment form linked to the post by its transaction id. The id is passed into the Comment component on the View page and received for use within the component. This helps the network associate comments with a given post.
We need 3 functions for handling comments. A function to add comments, a function read new comments added to a post and a function to fetch existing comments when the component renders for the first time upon app refresh. We start with the function for adding comments on a post.
We have a predefined component named in src/components/comment.svelte. Let’s build on it.
// src/components/comment.svelte

<script>
  // imports
  import {
    writeContractWOthent,
    readContractWOthent,
  } from "permawebjs/contract";
  import { profile } from "../store";
  import { take } from "ramda";
  import Deploy from "../dialogs/deploy.svelte";
  import Error from "../dialogs/error.svelte";
  import { onMount } from "svelte";

  // id variable to get the transaction id of an asset (post) from the view page
  export let id = "";

  // object to handle users' requests to add comments on multiple posts
  let comments = {};

  // array storing the comments information for a post
  let commentsArray = [];

  // pop dialog boxes for status updates
  let deployDlg = false;
  let errorMessage = "";
  let errorDlg = false;

  // function to add comment
  async function addComment(e) {
    try {
      // opens pop up showing posting in progress
      deployDlg = true;

      // function to call `addComment` function from post's contract
      // sends function name, username and comment text as inputs
      const res = await writeContractWOthent({
        // function name to indicate writing to a contract
        apiId: "YOUR_API_KEY",
        othentFunction: "sendTransaction",
        data: {
          toContractId: id,
          toContractFunction: "addComment",
          txnData: {
            function: "addComment",
            username: $profile
              ? $profile.name
              : "",
            comment: comments[id],
          },
        },
      });

      // closes pop up after successful comment addition and resets the input box in ui
      deployDlg = false;
      e.target.reset();

      // fetches the latest comments on a post and stores result in commentsArray
      commentsArray = await readComments();
    } catch (e) {
      // error handling to display error in pop up
      deployDlg = false;
      errorMessage = e.message;
      errorDlg = true;
    }
  }
</script>

<!-- comment component ui -->
The addComment function calls permawebjs' writeContractWOthent function that enables interacting with existing contracts using email addresses or Google accounts, similar to the previous othent functions. Since our posts are contracts as well, we can interact with them using this function.
The function receives comment information from the input form as well as the user details of the connected user so that a comment can be linked to the user posting it.
The othentFunction parameter informs the function on the backend that this interaction is a write call to the post which is identified using the id passed into the data object as toContractId. As seen earlier, both the post and the logic to modify it point to the same transaction id, hence we use the post’s transaction id to make write calls to its contract.
The txnData is an object of inputs required by the contract function to perform a valid interaction.
As with the createPost function defined earlier, we use the trycatch statement for error handling and a few dialog boxes help indicate the status of posting the comment.
A successful comment request is followed by a call to update the commentsArray to display the latest comments.
Once users have the ability to make comments we want to render these with the posts. For that, we need a reader function.
// src/components/comment.svelte

<script>

// addComment function defined in the previous section...

// reads the state of a post and returns the list of comments from it
  // requires the post's transaction id (received from View Page in the 'id' var)
  async function readComments() {
    const res = await readContractWOthent({
      apiId: "YOUR_API_KEY",
      contractTxId: id,
    });

    return res.state["comments"];
  }

// onMount function placeholder to be defined
</script>

<!-- comment component ui -->
The readComments function can read a contract’s current state and return the comments array from it with the readContractWOthent utility from permawebjs' contract capabilities. The function only needs the transaction id of the post passed in as contractTxId.
We have to use a read function instead of a query (for fetching our posts’ metadata) as the contract’s current state cannot be queried with the query language. It must be evaluated from the contract source logic, the initial state and all previous interactions with the contract in order of occurrence.
There are a few protocols that help users perform this step on their backend and return the resulting current state for use. permawebjs leverages these protocols under the hood to fetch the updated state for a contract.
The state returned from these function calls can be verified at any time directly from the network. Thus, enabling the maintenance of the benefits of decentralization.
Lastly, we want to fetch and render the comments when the app is refreshed. A simple onMount as defined for posts, does the trick:
// src/components/comment.svelte

<script>

// addComment and readComments functions defined in the previous section

    // fetches the latest list of comments for a post on the components first render
  onMount(async () => {
    commentsArray = await readComments();
  });
</script>

<!-- comment component ui... -->
The latest state of comments on a post is fetched by calling the readComments function and the result is stored in the commentsArray.
// src/components/comment.svelte

<!-- comment component ui... -->

    <!-- ensures commentsArray has comments -->
    {#if commentsArray.length > 0}
      <!-- maps over elements of commentsArray -->
      <!-- each element is given temp name 'comment' -->
      {#each commentsArray as comment}
        <p class="text-sm px-4 md:px-12 gap-2 flex flex-row w-full">
          <!-- renders commenter's username or id -->
          <strong
            >{comment.username && comment.username != ""
              ? comment.username
              : take(5, comment.id)}</strong
          >: {comment.comment}
        </p>
      {/each}
    {/if}

<!-- comment component ui... -->
We check if the commentsArray variable has any data. If it does then every comment in the array is iterated upon and stored in a temp variable named comment which is then indexed to render comment information like comment text and the user name of the commenter.
Interactive Functionality Definition for Comments Complete Code

Woohoo! Now we can comment on posts! ⌨️
Defining Functionality for Liking Posts
The last feature we want to implement in our application is to like a post. Let’s navigate to src/components/like.svelte and build on it.
Similar to the comment component, every post has a dedicated like component linked to it by its transaction id. The post’s id is passed into the Like component on the View page and received for use within the component. This helps the network associate comments with a given post.
For the Like component as well, 3 functions are required. A function to like a post, to read likes on a post, and to fetch existing likes when the component renders for the first time upon app refresh.
Let’s start by implementing the “like” feature.
// src/components/like.svelte

<script>
  // imports
  import {
    readContractWOthent,
    writeContractWOthent,
  } from "permawebjs/contract";
  import { profile } from "../store";
  import { onMount } from "svelte";

  // id variable to get the transaction id of an asset (post) from the view page
  export let id = "";

  // object to store likes information for a post
  let likes = {};

  // function to like posts
  async function likePost() {
    // function to call `likePost` function from post's contract\\
    const res = await writeContractWOthent({
      apiId: "YOUR_API_KEY",
      othentFunction: "sendTransaction",
      data: {
        toContractId: id,
        toContractFunction: "likePost",
        txnData: {
          function: "likePost",
        },
      },
    });

        // fetches the latest likes on a post and stores result in 'likes'
    likes = await readLikes();
  }
</script>

<!-- like component ui... -->
The likePost function triggers the writeContractWOthent function that enables interacting with existing contracts.
The othentFunction parameter informs the function on the backend that this interaction is a write call to the post which is identified by passing the id to the data object with key toContractId. The txnData only requires the function name.
A successful like request is followed by a call to update the likes object with the latest likes.
Once users have the ability to like, we want to read these so that they can be rendered.
// src/components/like.svelte

<script>

// likePost function defined in the previous section...

// reads the state of a post and returns the likes object
  async function readLikes() {
    const res = await readContractWOthent({
      apiId: "YOUR_API_KEY",
      contractTxId: id,
    });

    return res.state["likes"];
  }

// onMount function placeholder to be defined
</script>

<!-- like component ui -->
The readLikes function can read a contract’s current state and return the likes object from it. The function only needs the transaction id of the post passed in as contractTxId.
Lastly, we want to fetch and render the comments when the app is refreshed. A simple onMount as defined for posts does the trick:
// src/components/like.svelte

<script>

// likePost and readLikes functions defined in the previous section

    // fetches the latest likes information for a post on the components first render
  onMount(async () => {
    likes = await readLikes();
  });
</script>

<!-- likes component ui... -->
The latest state of likes on a post is fetched by calling the readLikes function and the result stored in the likes object.
// src/components/likes.svelte

// <script> tags

<section>
  <!-- Calculates number of keys object -->
  <!-- number keys corresponds to the number of likes for a post -->
  <p class="text-center">{Object.keys(likes).length}</p>
  <!-- button to like a post -->
  <!-- button is disabled if user has already liked post -->
  <button
    class="btn btn-block"
    disabled={Object.keys(likes).includes($profile.contract_id)}
    on:click|preventDefault={likePost}>Like</button
  >
</section>
We check and display the total number of keys in the likes object as the number of likes corresponds to the number of key-value pairs in the object. Every new like stores the user’s id as the key and the like number as the value.
If a user has already liked a post, the like button is disabled for them.
And finally, we have the like! 👍
Quick Recap
Pat yourselves on the back and grab some ice cream! We have just created a full-stack image-sharing application on Arweave!
Let us take a look at what we’ve accomplished today:
Understood the Smart Contract Standards on Arweave, various Functional Programming Patterns and their implementation.
Learned about distinct data types like Atomic Assets.
Implemented User Authentication helping onboard users from Web2 to Web3.
Created Posts as Atomic Assets on Arweave.
Queried for posts on the network and rendered them on the frontend.
Interacted with Posts, modifying their state by making calls to the Asset contract and viewing the changes in real-time.
Congratulations! You’ve completed Arweave Frontier: Build on the Edge of Blockchain!
Thank you for joining us on our adventure through the permaweb. Share your builds with us on Twitter.